
Flight basics#
Your ship flies with a persistent throttle: W and S set it and it stays where you leave it, from full ahead down to half speed in reverse. X is all stop. Steering depends on your flight scheme (mouse flight, mouse aim or keyboard; see the controls), and A / D roll, Q / E strafe sideways and R / F strafe up and down.
- Flight assist (on)
- The default. The ship holds the speed your throttle asks for and cancels drift when you turn, like a plane. Autopilots always fly with it on.
- Flight assist off
- Press Z. The ship keeps its momentum: you can turn to face a target while sliding past it, strafe around it, or coast. The status gauge shows FA OFF in amber while it is off. Press Z again to turn it back on.
- Boost
- Hold Shift for a burst well past your top speed. The boost gauge drains while you burn and refills when you ease off, slowly, so keep some for an escape.
- Strafing
- Strafe thrusters push the ship sideways and up or down without turning. Combined with flight assist off, they let you dodge while keeping your guns on target.
Every hull handles differently. Small hulls turn fast and accelerate hard; big ones are slow to turn and slow to stop, so plan your approach. The fitting window shows your ship's top speed, boost speed, agility and warp speed with your modules and skills applied; Piloting and Navigation skills improve them.
Cruise drive#
Press G for the cruise drive: fast, free flight inside a system without picking a destination. It spools up for 3 seconds (press G again during the spool to cancel), then carries you along your nose. Cruise speed grows with your distance from the nearest body, so it is slow near a planet or station and very fast in open space. Turning is gentler while cruising.
- Cruise will not engage close to a station or gate (the structure mass-locks the drive), and it cannot start inside an atmosphere.
- It drops out by itself before you would fly into a station or gate, and when you enter an atmosphere.
- Press G or X to drop out yourself. Use cruise to look around, reach a spot with no marker, or approach a planet for landing: within 75 km of a landable world's surface, Y starts the landing assist.
Flight speeds of every hull#
The table lists each hull's base numbers before modules and skills. The Fairwind is the fastest hull in normal flight. Align time is how long the hull needs to line up before warp; the last column is how long a one AU warp takes once aligned (most warps inside a system are shorter).
Speeds, align times and warp speeds (all hulls)
| Hull | Class | Top speed | Boost speed | Align time | Warp speed | 1 AU warp |
|---|---|---|---|---|---|---|
| Dartwing | Outrider | 380 m/s | 720 m/s | 2 s | 0.282 AU/s | 8.1 s |
| Delver | Prospector | 180 m/s | 300 m/s | 4 s | 0.218 AU/s | 10.0 s |
| Fairwind | Circuit Ship | 470 m/s | 860 m/s | 1.6 s | 0.301 AU/s | 7.8 s |
| Nightjar | Torpedo Craft | 300 m/s | 560 m/s | 2.5 s | 0.262 AU/s | 8.6 s |
| Sparrow | Skirmisher | 260 m/s | 480 m/s | 3 s | 0.241 AU/s | 9.2 s |
| Wayfarer | Pathfinder | 290 m/s | 520 m/s | 2.4 s | 0.310 AU/s | 7.8 s |
| Furrow | Prospector | 170 m/s | 290 m/s | 4.5 s | 0.218 AU/s | 10.0 s |
| Gleaner | Pathfinder | 210 m/s | 380 m/s | 4 s | 0.251 AU/s | 9.0 s |
| Halberd | Gunship | 210 m/s | 380 m/s | 5 s | 0.218 AU/s | 10.0 s |
| Hewer | Prospector | 165 m/s | 280 m/s | 5 s | 0.213 AU/s | 10.2 s |
| Palisade | Skirmisher | 225 m/s | 410 m/s | 3.6 s | 0.236 AU/s | 9.4 s |
| Peregrine | Hauler | 195 m/s | 330 m/s | 4.5 s | 0.251 AU/s | 9.0 s |
| Suture | Mender | 205 m/s | 360 m/s | 5 s | 0.222 AU/s | 9.8 s |
| Astrolabe | Pathfinder | 285 m/s | 520 m/s | 3 s | 0.327 AU/s | 7.6 s |
| Bulwark | Warship | 150 m/s | 250 m/s | 7 s | 0.193 AU/s | 11.0 s |
| Carrion | Raider | 190 m/s | 330 m/s | 6 s | 0.213 AU/s | 10.1 s |
| Driftcomber | Hauler | 120 m/s | 190 m/s | 9 s | 0.187 AU/s | 11.3 s |
| Lifeline | Mender | 140 m/s | 235 m/s | 7 s | 0.198 AU/s | 10.8 s |
| Longsight | Pathfinder | 270 m/s | 500 m/s | 3.2 s | 0.336 AU/s | 7.6 s |
| Mule | Hauler | 110 m/s | 180 m/s | 10 s | 0.179 AU/s | 11.8 s |
| Quarrier | Dredge | 95 m/s | 150 m/s | 10 s | 0.179 AU/s | 11.8 s |
| Quiver | Warship | 155 m/s | 260 m/s | 7 s | 0.193 AU/s | 11.0 s |
| Herald | Doctrine Ship | 122 m/s | 200 m/s | 12 s | 0.170 AU/s | 12.2 s |
| Ironclad | Heavy Warship | 120 m/s | 200 m/s | 12 s | 0.164 AU/s | 12.5 s |
| Tradewind | Hauler | 90 m/s | 140 m/s | 14 s | 0.164 AU/s | 12.6 s |
| Monolith | Ship of the Line | 85 m/s | 140 m/s | 16 s | 0.139 AU/s | 14.5 s |
| Colossus | Fighter Tender | 55 m/s | 80 m/s | 30 s | 0.112 AU/s | 16.6 s |
| Hegemon | Flagship | 46 m/s | 66 m/s | 36 s | 0.104 AU/s | 17.4 s |
| Asterion | Behemoth | 30 m/s | 44 m/s | 55 s | 0.087 AU/s | 19.3 s |
| Borealis | Behemoth | 28 m/s | 41 m/s | 58 s | 0.085 AU/s | 19.7 s |
| Nacre | Behemoth | 36 m/s | 52 m/s | 48 s | 0.095 AU/s | 18.4 s |
| Ophion | Behemoth | 32 m/s | 46 m/s | 56 s | 0.090 AU/s | 19.0 s |
| Meridian | Behemoth | 22 m/s | 32 m/s | 72 s | 0.077 AU/s | 21.0 s |
| Tellurion | Worldship | 12 m/s | 16 m/s | 110 s | 0.061 AU/s | 24.4 s |
From the game's own data
Warp#

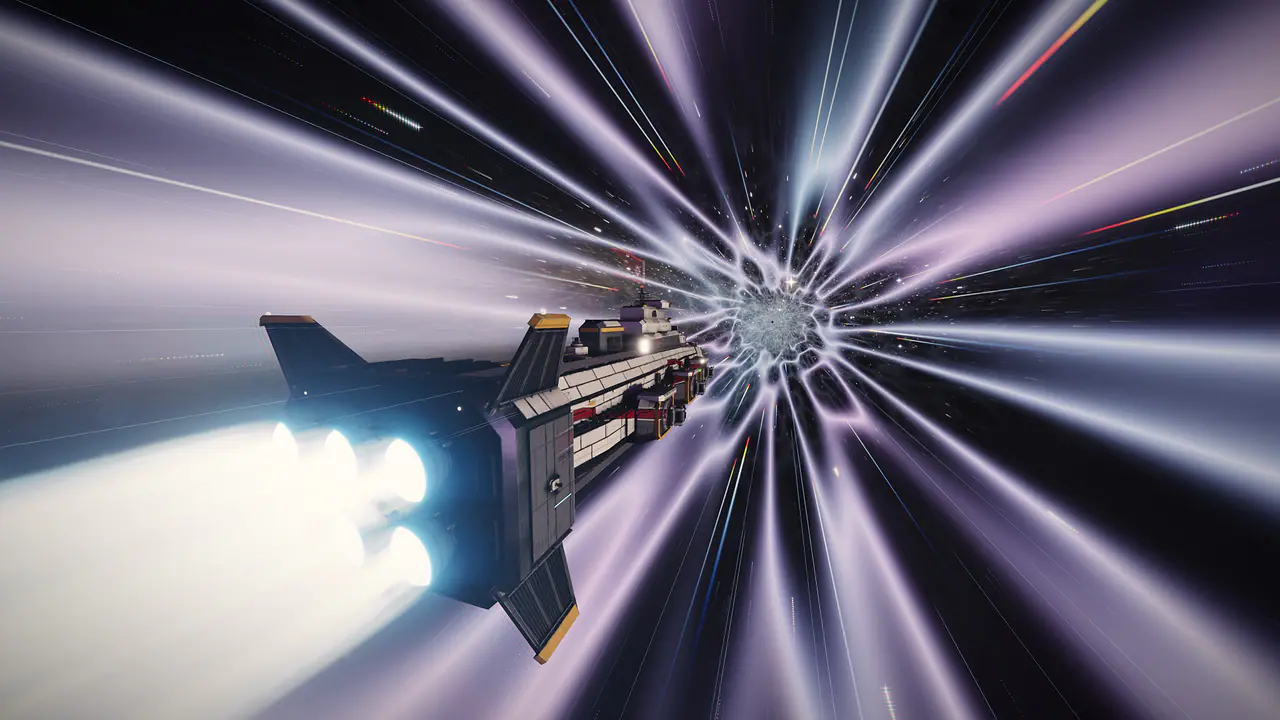
Warp takes you straight to anything in the system: a station, a gate, a planet, a belt, a site or another ship far away. Select the destination in the Tactical list or in space, then press J (or Warp to on its target card).
- Align
The ship turns its nose toward the destination. The screen says Aligning for warp; heavier hulls take longer.
- Spool and warp
The drive spools up and the ship enters warp. While in warp you cannot be damaged.
- Drop out
The ship slows down and arrives at a safe distance from the destination: next to a station, close to a gate, or about 70 km above a landable planet.
- A small hull's whole warp, align included, takes well under ten seconds for most trips. Bigger hulls align and warp more slowly, and the largest spend most of a trip lining up.
- Warp needs some distance: for a celestial closer than 20 km, use the nearby dock, jump or land action instead (they fly you there directly).
- You cannot warp while landed or inside an atmosphere: climb out first. Warping to a landable planet drops you about 70 km above it, inside landing range.
- Warp routes bend around stars and planets in the way, and the drop-out is pulled back so you never arrive inside a structure.
- X during the align cancels the warp.
Gates and jumping#

Jump gates link star systems into a network of lanes. Select a gate and press J: from far away your ship warps to the gate and jumps on arrival; within 3.5 km of it, the jump starts at once. A short transit plays and you arrive at the matching gate in the next system.
- You arrive with a brief grace period, so you have a moment to look around before anyone can hurt you. It ends as soon as you move, lock a target, fire or switch on a module.
- Gate control refuses criminals in Secure space: while you are marked a criminal there, you cannot jump. See the law.
- Combat timer: for a minute after you damage another pilot or a Marshal, you cannot jump or dock.
- Members' gates lead into the Vanguard members' regions. Gate control clears only Vanguard Charter pilots through them; every other system is open to everyone.
- Behemoth hulls jump from a little further out, since they are too big to come close to a gate.
- Settings, Gameplay, Transit cutscenes can switch the jump tunnel to a quicker, simpler transition.
The cluster has 750 systems in 30 regions. The core holds the three powers; past the long conduits lie the frontier regions, and past those the Far Ring, where the charts thin out.
The galaxy map#
Press M for the galaxy map: every star system as a point of light, colored by security, joined by its jump lanes, with region outlines and names, faction and clan territory, and your route.

- Moving around
- Drag to rotate, right-drag or Shift-drag to pan, and use the wheel to zoom at the cursor. Double-click a system to fly the view to it. Me centers on your system, Galaxy shows everything. On touch screens: drag to rotate, pinch to zoom, two fingers to pan.
- Search
- Type a system or region name (press / to jump to the search box) and pick a result to fly the view there.
- The system panel
- Click a system to see its security rating, region, owning faction, stations, landmarks and planets, your favorites there, and the route to it.
- Hover cards
- Hover a system for a quick card: name, security, faction and anything notable there, such as your colonies.
- Legend
- Explains every color, ring and symbol on the map.
- Layers
- Switch on or off: jump lanes, region names, region outlines, faction territory, clan territory, Vanguard members' regions, charting phenomena, Racing Ports, stations, your hunting target, your colonies, Retainer wings and your favorites.
- Highlight security
- Dim everything except Secure, Contested or Lawless systems, to see at a glance where the safe space ends.
Security#
Each system has a security rating. The map colors systems from blue and green (the safest) through yellow and orange to red (Lawless). The rating decides which of three bands the system belongs to:
| Band | Rating | Systems | What it means |
|---|---|---|---|
| Secure | 0.5 to 1.0 | 194 | Accord Marshals patrol and answer crimes. Pirates are rare and weak at the belts. Attacking another pilot is a crime. |
| Contested | 0.1 to 0.4 | 273 | No police. Pirates come in packs. Attacking a pilot costs law standing and marks you a criminal for a while. |
| Lawless | 0 and below | 283 | No police and no penalties: anyone may attack anyone. The richest sites, ores and wrecks are here. |
From the game's own data
What the markers mean#
- A bigger star is a faction capital. A halo in a faction's color marks its territory; a violet halo with a tag marks a clan's.
- A dashed lane is a long conduit, a lane of 38 light years or more.
- A pulsing red ring is a Crown raid in progress; a violet ring is a Wandering Singularity.
- Your route is drawn in gold, your own system has a cyan ring and the selected system a pale gold ring.
- A diamond marks a members' gate, and a ring marks a system in a Vanguard members' region.
Routes and autopilot#
You never have to fly a long trip by hand. Anything in the game with a place (missions, quests, contracts, colonies, your flotilla, world bosses, raids, sightings, market orders and any system on the map) has a Travel button that plots the route and flies it for you.
- Pick the destination
Open the galaxy map with M and click the system you want (or use Travel on a mission, quest or market order).
- Choose the route
In the system panel, choose Shortest (fewest jumps) or Safest (fewest Contested and Lawless systems). The panel shows how many Secure, Contested and Lawless systems the route crosses, and the other route's numbers for comparison.
- Travel or set it
Travel here starts at once. Set destination only plots it: it appears in the Destination card on your HUD, ready for later.
- Fly it
The autopilot undocks you if needed, warps to each gate, jumps, and on arrival warps to the destination and docks or lands. A cyan marker in space shows the next waypoint.
- Take over any time
Steer, press X, or press . again to stop. Press . (or Travel in the Destination card) to resume.
- The . key flies to your plotted destination, or to your tracked quest objective when nothing is plotted. A gold diamond in space marks the next quest objective.
- Your Shortest or Safest choice is remembered and the autopilot follows it on every trip.
- Travel only uses routes you are allowed on: pilots without the Vanguard Charter are routed around the members' regions.
Travel to the nearest#
The Skills window has Travel to nearest on the unlocks you can use: the closest belt with an ore you can mine, the closest world with a planetary resource, a combat site of a tier, a system with hidden sites of your level, a world to found a colony on and more. The Market and the Resources window offer Find nearest source for ores and planetary materials. Nearest means fewest jumps, then the shortest flight in that system, and you can limit the search to Secure space only, Secure and Contested, or anywhere.
Favorites#
Star any place to keep it one click away. Tap ☆ on a target card, a Tactical row, a station, a planet, a colony, a system on the galaxy map, or the result of a Travel to nearest. Press ' (or Favorites in the menu bar) to open the Favorites window.
- Favorites are grouped by system, nearest first, and sorted by folder and name inside each system.
- Give each one a name (up to 40 characters), a folder (up to 24, for example Trade, Mining or PvP), a note (up to 200) and one of 7 color tags. Click the star in a row to cycle its color.
- Search matches names, folders, notes and system names, and the folder picker shows one folder at a time.
- One click flies there through the normal journey: stations and spaceports dock, worlds can land, everything else warps, and other systems plot the gate route first.
- Save my position (in space) keeps the point where your ship is now. Warping back to it uses the normal warp rules. A saved point must be in open space: at least 60 km above any world and well clear of the star.
- Two switches show your favorites as small stars in space and on the galaxy map.
- Pilots keep up to 100 favorites; Vanguard pilots keep 250.
The Tactical list#
The Tactical list on the right of the HUD lists everything around you: ships, stations, gates, planets and moons, belts and asteroids, wrecks and sites, each with its icon, name and distance. Click a row to select it (its card appears above the list); double-click to select it and run the context action, the same as J.

Search#
Type in the search box (or press Ctrl + F) to filter by name, type or ship: try a station name, "gate", "asteroid", a hull name, or a standing word such as "hostile" or "friendly". Enter selects the first match; Esc clears the box, then leaves it.
Filter chips#
| Chip | Shows |
|---|---|
| All | Everything (no filter) |
| Players | Other pilots |
| Hostiles | War targets, criminals and hostile ships |
| NPCs | Non-player ships and fighters |
| Stations | Stations, spaceports, race grids and colonies |
| Gates | Jump gates |
| Rocks | Asteroids and belts |
| Wrecks | Wrecks and derelicts |
| Celestials | Planets, moons, stars, sites and other places |
- Click or tap a chip to show only that kind. Click the same chip again (or All) to see everything.
- To combine chips, hold Ctrl (Cmd on a Mac) or Shift while you click, or press and hold a chip on a touch screen: Players and Hostiles together show both. Do the same again to take a chip out.
- Each chip shows how many rows it would show; Reset goes back to All, nearest first.
- The sort menu orders the list by Nearest, Name or Type. Your chips and sort are remembered.
- Sorted by Nearest without a search, each planet's moons and stations are nested under it. The small arrow beside a planet folds them away.
- Ship rows carry a HOSTILE, NEUTRAL or FRIENDLY tag. Asteroids above your Mining level show a lock with the level they need.
- The header shows how many rows are visible (and of how many when filtered). The arrow in the header folds the whole list; phones start with it folded.
Ship colors#
Ships and other contacts are colored by their standing toward you, in the list and on their markers in space:
- Gold
- Neutral pilots and ships.
- Cyan
- Friendly: your clan and your crews.
- Red
- Hostile NPCs, such as Hollow Crown pirates.
- Violet
- War targets and pilots marked criminal: lawful to attack.
- Pale blue
- Accord Marshals.
Navigation icons#
Every kind of place and contact has its own white line icon. The same icon appears in the Tactical list, on the target card, on the galaxy map's system panel and on the markers in space, so a shape always means the same thing.
| Icon | What it looks like | What it marks |
|---|---|---|
| Star | A circle with eight short rays | The system's sun |
| Rocky planet | A circle with craters | Rocky, desert, lava and other solid worlds |
| Gas giant | A small circle with a tilted ring | Gas giants |
| Ice world | A circle crossed by bands | Frozen worlds |
| Ocean world | A circle with two wavy lines | Ocean worlds |
| Moon | A crescent | Moons |
| Station | A hexagon with a dot in the middle | Orbital stations: dock, trade, repair and fit here |
| Spaceport | A downward arrow over a landing pad | Planetary spaceports: land on the pad to dock |
| Gate | Two brackets around a dot | Jump gates to other systems |
| Asteroid belt | A curve dotted with rocks | Asteroid belts |
| Asteroid | A single jagged rock | Individual rocks you can mine |
| Site | A four-pointed star | Sites such as combat sites, wreck fields and scanned hidden sites |
| Phenomenon | A ring around a four-pointed star | Charting phenomena |
| Shatterdrift | Three broken shards | Shatterdrifts, the old battle-wreck graveyards |
| Beacon | A mast with radio arcs | Clan beacons |
| Singularity | A filled dot in a ring with two ticks | Wandering Singularities |
| Dark matter pocket | A dashed ring around a dot | Dark Matter Pockets |
| Race grid | A striped flag on a pole | Racing Port start grids |
| Colony | A dome with a flag | Colonies |
| Wreck | Broken struts and debris | Wrecks and derelicts you can loot or salvage |
| Pilot | An outlined arrowhead | Another pilot's ship |
| NPC ship | A filled arrowhead | Non-player ships: pirates, Marshals, traders |
| Fighter | A small filled arrowhead | Strike fighters launched from a Fighter Tender |
| Missile | A dot with a short trail | Missiles in flight |
| Contact | A small circle | Anything else |
For ships, the icon's color shows standing, as in the Tactical list: gold for neutral, cyan for friendly, red for hostile NPCs, violet for war targets and criminals, pale blue for Marshals.
Docking and undocking#

Stations are your safe harbor. Docked, your ship cannot be attacked, and you can repair, refit, trade, store ships and items, and take jobs.
- Dock
- Select a station and press J (or Dock on its card). From far away your ship warps in and docks on arrival; from close by it flies in. Press , to dock at the nearest station in the system without selecting anything.
- Emergency warp
- B (or Emergency warp in the combat panel) warps to the nearest station and docks. Use it the moment a fight turns.
- Spaceports
- Planetary spaceports are docked by landing on their pad: select the spaceport and press Land at spaceport or Dock, and the landing assist puts you down.
- Undock
- Press Undock on the station screen. A short launch sequence plays (skip it with Esc, Space or Enter), and you appear outside with a short grace period that ends when you act.
- You cannot dock (or jump) for a minute after you damage another pilot or a Marshal. Finish the fight or fly away first.
- Behemoths are too big for a hangar: they moor at an orbital station berth and undock with Release orbital moorings. They cannot use planetary spaceports or land.
- The Worldship never docks at all: it anchors in a station's deep anchorage and leaves with Weigh anchor.
- When docked, , undocks you.
Something missing or out of date? Tell us on our Discord. More answers in the FAQ.