
Mining#
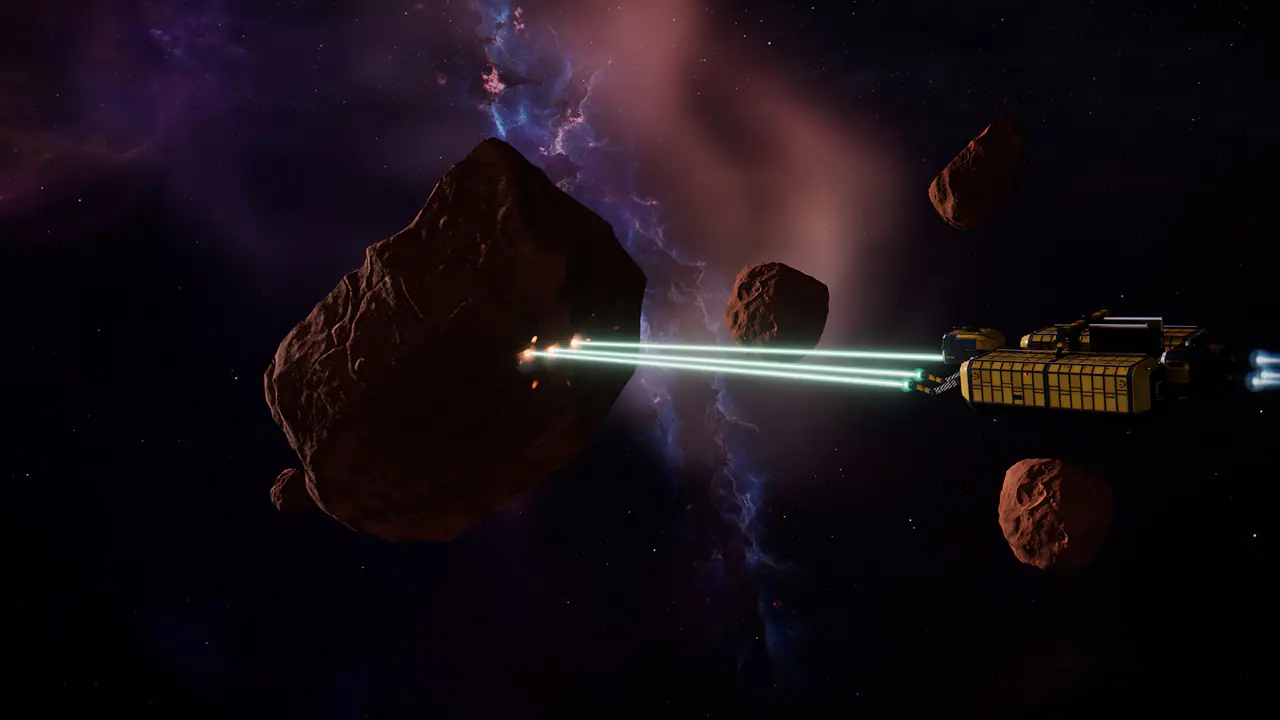
Mining is the most relaxed way to earn credits and the start of the whole industry chain. You need a ship with a mining laser fitted and room in your cargo hold. Every new pilot gets a Mining Laser S in the starter hangar, so you can start on your first day.
- Fit a laser
Dock, open Fitting and put a mining laser in a free high slot. Small lasers fit utility or fixed mounts. A dedicated mining hull carries more lasers and a much bigger hold.
- Warp to a belt
Asteroid belts are listed in Tactical and on the system map. Select one and warp. Secure belts are mostly Ferrosite and Silvarite, which need no training.
- Mine automatically
Select an asteroid and click Mine automatically, or press 0. Your ship approaches, locks the rock, runs its lasers and moves on to the next rock nearby when one is worked out.
- Let it fill
Ore goes straight into your cargo hold. A full hold stops the lasers; X stops the assist at any time. Switch on Next ore to let the assist move to any ore you can mine, not just the one you started on.
- Sell or refine
Dock and sell the ore on the market (every station buys every belt ore), deliver it for an Ore Contract on the Job Board, or refine it in Industry.
Rocks you can't cut yet show a lock in Tactical, and the button tells you the level you need. Mining trains the Mining skill with every load, and rarer ores pay more XP per cubic meter. Each Mining level adds 0.5% yield, and the perks on the ladder (see Skills) cut battery use and add yield on top.
| Laser | Size | Ore per cycle | Cycle | Reach | Mining level | Notes |
|---|---|---|---|---|---|---|
| Mining Laser S | S | 12 m³ | 5 s | 1.8 km | 1 | |
| Tempered Mining Laser S | S | 14 m³ | 5 s | 2 km | 10 | |
| Vein Splitter S | S | 18 m³ | 6 s | 2.2 km | 20 | |
| Cryo-Tuned Laser S | S | 14 m³ | 5 s | 2 km | 30 | +60% on Glacite, -20% on other ores |
| Seam Cutter M | M | 95 m³ | 9 s | 3.5 km | 30 | |
| Auric-Tuned Laser S | S | 15 m³ | 5 s | 2 km | 50 | +60% on Aurelium, -20% on other ores |
| Seam Bore M | M | 165 m³ | 11 s | 4.2 km | 55 | |
| Void-Tuned Cutter M | M | 110 m³ | 9 s | 3.8 km | 60 | +30% on Voidstone and Xetite, -20% on other ores |
Small (S) lasers fit utility or fixed mounts; medium (M) lasers and bores need a medium utility mount. From the game's own data
Named mining lasers
Rarer variants of the standard lasers turn up in wreck fields, Crown strongholds and stranger places. They are tradeable like any other module, and no station sells them.
| Laser | Tier | Ore per cycle | Cycle | Mining level | Found |
|---|---|---|---|---|---|
| Exodus-Pattern Mining Laser S | Epic | 16.2 m³ | 5 s | 40 | Wreck fields and Crown strongholds |
| Exodus-Pattern Seam Cutter M | Epic | 128.3 m³ | 9 s | 40 | Wreck fields and Crown strongholds |
| Deepvein Cutter | Legendary | 161.5 m³ | 10.4 s | 60 | The deepest wreck fields |
| Penrose Cutter | Legendary | 118.8 m³ | 7.7 s | 60 | Crossing a Wandering Singularity |
| Syndicate-Issue Mining Laser S | Rare | 14.2 m³ | 5 s | 20 | Merit store at Kheper Syndicate stations |
| Syndicate-Issue Seam Cutter M | Rare | 112.1 m³ | 9 s | 30 | Merit store at Kheper Syndicate stations |
From the game's own data
Ships and ore holds#
Ore is bulky (half a cubic meter a unit), so the size of your hold decides how long you can stay out. Mining ships have a big hold and mounts for several lasers; haulers can carry a pair of small lasers under the nose when you want to mine and haul in one hull. A Hold Extension in a low slot makes any hold bigger.
| Hull | Class | Hold | High slots | Skills to fly |
|---|---|---|---|---|
| Delver | Prospector | 450 m³ | 2 utility S, 1 fixed S | Mining 5 |
| Hewer | Prospector | 1,800 m³ | 3 utility S, 1 fixed S | Mining 15 |
| Quarrier | Dredge | 8,000 m³ | 3 utility M, 2 turret S | Mining 30 |
| Mule | Hauler | 12,000 m³ | 1 turret S, 2 utility S | Trading 15 |
| Tradewind | Hauler | 24,000 m³ | 2 turret S, 2 utility S | Trading 30, Navigation 20, Piloting 15 |
From the game's own data
Automated mining runs#
At Mining 90 you can start an automated run from the mining panel: when the hold is full your ship docks at the nearest station, unloads into your hangar and flies back to the belt, again and again. It is a convenience for veterans, not a shortcut: ore cut on a run yields 25% less, each account gets 3 hours of runs per day (shared by all its pilots, reset at 00:00 UTC), and the run asks you to confirm you're still at the controls every 30 minutes. A hostile pilot or pirate closing in stops it.
Ores#
Each ore has a Mining level to cut it and a Refining level to process it. Refining levels are gentler, so an ore you can mine you can almost always refine. Rarer ores are worth far more per unit, and they grow in the more dangerous parts of the cluster.
| Ore | Rarity | Mining level | Refining level | Refines into (at 100% yield) | Where you find it | Regrows in |
|---|---|---|---|---|---|---|
| Ferrosite | Common | 1 | 1 | 5 Ferrium per 10 ore | Secure, Contested belts | 15 min |
| Silvarite | Common | 1 | 1 | 4 Siliqon + 1 Ferrium per 10 ore | Secure, Contested belts | 15 min |
| Cobaltine | Common | 15 | 1 | 4 Cobaltium + 2 Ferrium per 10 ore | Secure, Contested, Lawless belts | 15 min |
| Glacite | Uncommon | 30 | 5 | 5 Cryo Isotopes per 10 ore | Secure, Contested, Lawless belts | 45 min |
| Pyrestone | Uncommon | 40 | 10 | 5 Pyronite per 10 ore | Contested, Lawless belts | 45 min |
| Aurelium | Uncommon | 50 | 20 | 4 Aurelite + 2 Ferrium per 10 ore | Contested, Lawless belts | 45 min |
| Voidstone | Rare | 60 | 30 | 4 Void Matter + 1 Cobaltium per 10 ore | Lawless belts | 2 h |
| Xetite | Rare | 75 | 45 | 4 Xetium + 1 Void Matter per 10 ore | Lawless belts | 2 h |
| Novacite | Epic | 85 | 60 | 3 Nova Lattice + 1 Xetium per 10 ore | Rare motherlode clusters in Lawless belts | Its own timer |
Belt mixes are for the core cluster; frontier regions carry their own blends. A rock you cut empty regrows in its belt after the time shown. From the game's own data
- Ferrosite and Silvarite need no training and fill most of every Secure belt. Ferrium, refined from both, goes into almost everything.
- Cobaltine, Glacite, Pyrestone and Aurelium are the mid-game ores. Contested belts carry the widest mix.
- Voidstone and Xetite grow only in Lawless belts. Their rocks are few and slow to regrow, so miners work the common rock between them.
- Novacite grows in rare motherlode clusters in Lawless belts. It refines into Nova Lattice, which spinal lances and the biggest hulls are built on.
Moon ores
Moons hold deposits of their own, drilled by rigs you build with the Extracting skill (a Vanguard skill). Anyone with the Refining level can refine the ore, wherever it came from. See Planets: moons.
| Ore | Refining level | Refines into (at 100% yield) |
|---|---|---|
| Grayfall Regolith | 1 | 3 Ferrium + 2 Siliqon per 10 ore |
| Ilmenite Sand | 5 | 4 Ilmenar + 2 Ferrium per 10 ore |
| Cold-Trap Ice | 10 | 3 Cryo Isotopes + 3 Heavy Water per 10 ore |
| Helium-3 Fines | 20 | 4 Helium-3 + 1 Siliqon per 10 ore |
| Rare-Earth Nodules | 30 | 8 Rare Earths + 3 Aurelite per 10 ore |
| Impact Glass | 40 | 12 Siliqon + 3 Void Matter per 10 ore |
| Meteoric Iron-Nickel | 50 | 5 Iridium + 2 Cobaltium per 10 ore |
| Core Song Crystal | 60 | 3 Xetium + 3 Iridium per 10 ore |
From the game's own data
Refining#
Refining turns raw ore into the refined materials that manufacturing uses. It is instant and works at every station: dock, open Industry, choose the Refinery tab and click Refine all next to an ore.
- Refining works on ore in the station hangar, in batches of 10 units. Unload your cargo into the hangar first; leftovers under a full batch stay as ore.
- A pilot with no training gets about 70% of the full output. Every Refining level adds 0.3%, and the Careful Refining perks add another point each. At Refining 90 Flawless Refining brings you to 100%: nothing is lost.
- Assayer's Eye, the synergy of Mining and Refining, adds up to 2% more yield once both skills reach 90.
- Refining trains the Refining skill by the volume of ore you process.
| Refining level | Yield | With Assayer's Eye (Mining at the same level) |
|---|---|---|
| 1 | 70.3% | 70.3% |
| 10 | 73% | 73% |
| 20 | 76% | 76.5% |
| 30 | 79% | 79.5% |
| 40 | 83% | 84% |
| 50 | 86% | 87% |
| 60 | 90% | 91.5% |
| 70 | 94% | 95.5% |
| 80 | 98% | 99.5% |
| 90 | 100% | 100% |
| 99 | 100% | 100% |
Yield never goes above 100%. Fractions of a unit are lost, so refine in large batches. From the game's own data

Manufacturing#
Manufacturing turns refined materials into components, and components into modules, ammunition and ships. Like refining, it works at every station. Open Industry and choose Manufacturing.
- Get the blueprint
You need the item's blueprint in the station hangar or in your docked ship's cargo. Blueprints are reusable: a job does not use it up.
- Gather the materials
Materials are taken from this station's hangar. The Manufacturing tab shows what each run needs and how many you have.
- Start the job
Choose how many runs (1 to 100) and click Start manufacturing. Jobs run in real time, also while you are offline.
- Deliver
When a job is done, dock at the station where it ran and click Deliver on the Jobs tab. The products go to that station's hangar.
Every job trains Industry, and longer jobs train more. Each Industry level takes 0.3% off job times, and every ten levels add a manufacturing slot, so a veteran runs many jobs in parallel. Batch Production at Industry 60 speeds up jobs of 10 or more runs.
| Industry level | Jobs at once | Job time (1 run) | Job time (10+ runs, each) |
|---|---|---|---|
| 1 | 2 | 99.7% | 99.7% |
| 10 | 3 | 97% | 97% |
| 20 | 4 | 94% | 94% |
| 30 | 5 | 91% | 91% |
| 40 | 6 | 88% | 88% |
| 50 | 7 | 85% | 85% |
| 60 | 8 | 82% | 73.8% |
| 70 | 9 | 79% | 71.1% |
| 80 | 10 | 76% | 68.4% |
| 90 | 12 | 73% | 62.1% |
| 99 | 12 | 70.3% | 59.8% |
Job time is shown as a share of the blueprint's listed time. Clean Feedstock (Refining and Industry) takes up to a few percent more off. From the game's own data
Components#
Almost every module and hull is built from six components. Some need planetary materials as well, which you gather on planet surfaces or buy at spaceports (see Harvesting).
| Component | Materials per run | Time per run | Industry level |
|---|---|---|---|
| Hull Plating | 20 Ferrium, 4 Cobaltium | 30 s | 1 |
| Quantum Processor | 6 Siliqon, 2 Aurelite, 1 Rare Earths | 45 s | 1 |
| Power Cell | 6 Pyronite, 4 Ferrium, 1 Magmatic Salts | 40 s | 1 |
| Thruster Assembly | 10 Ferrium, 5 Pyronite, 3 Cryo Isotopes | 1 min | 1 |
| Shield Emitter | 3 Aurelite, 2 Void Matter, 2 Siliqon, 1 Heavy Water | 1 min | 1 |
| Warp Coil | 2 Xetium, 4 Cryo Isotopes, 2 Void Matter | 2 min | 10 |
| Guidance Package | 1 Quantum Processor, 6 Siliqon, 2 Aurelite | 1 min | 1 |
From the game's own data
| Industry level | Blueprint group | Examples |
|---|---|---|
| 1 | Components & ammunition | Hull Plating, Quantum Processor, Power Cell, Thruster Assembly, Shield Emitter and 30 more |
| 1 | Small modules | Pulse Emitter S, Mass Driver S, Missile Launcher S, Mining Laser S, Scrap Reclaimer and 53 more |
| 10 | Advanced components | Warp Coil, Field Nanogel, Barrier Charge, Overcharge Coil, Thruster Stim and 12 more |
| 15 | Medium & advanced modules | Pulse Emitter M, Mass Driver M, Missile Launcher M, Seam Cutter M, Sensor Jammer and 40 more |
| 35 | Large modules | Pulse Emitter L, Mass Driver L, Siege Launcher L, Horizon Stabilizer, Helion Beam L and 9 more |
| 70 | Flagship weapons | Spinal Lance, Keelbreaker Torpedo Silo XL, Farreach Cruise Silo XL |
From the game's own data
Building ships#
Hulls are the biggest jobs in the game. Each tier needs a higher Industry level, its blueprint (trade hubs license the early hulls, the capital trade hubs the big ones) and a mountain of components. The largest hulls take days to build.
| Hull tier | Industry level | Hulls you can build | Longest build (1 run, before skills) |
|---|---|---|---|
| 1 | 1 | Sparrow, Dartwing, Fairwind, Delver, Nightjar, Wayfarer | 12 min |
| 2 | 5 | Palisade, Peregrine, Halberd, Hewer, Suture, Gleaner, Furrow | 25 min |
| 3 | 15 | Bulwark, Mule, Quarrier, Carrion, Lifeline, Quiver, Longsight | 1.5 h |
| 4 | 30 | Ironclad, Herald, Tradewind | 3.5 h |
| 5 | 45 | Monolith | 6 h |
| 6 | 55 | Colossus | 1 d |
| 7 | 65 | Hegemon | 2 d |
| 8 | 75 | Asterion, Nacre, Borealis, Ophion | 7 d |
| 9 | 80 | Meridian | 14 d |
From the game's own data
- Behemoths are too big for a planetary berth: they are built at orbital stations.
- The Hegemon's blueprint is never sold. Twelve Ark Schematic Fragments, dropped by world bosses and Crown Warlords, assemble into one at any station.
- The worldship is laid down with a Keel Charter, a single-use blueprint won from world bosses, and never in Secure space.
- Vanguard hulls have no blueprint: they come finished from the Vanguard store and Vanguard berths.

Blueprints#
A blueprint is a reusable original: keep it and it builds as many runs as you have materials for. It is never consumed (except the few single-use charters that say so), never learned, and never copied.
- Station markets
- Trade hubs sell blueprints for components, small, utility and medium modules, ammunition and the early hulls. The big capital trade hubs license the large weapons and the bigger hulls. Garrisons and foundries carry the blueprints for their own specialties.
- Other pilots
- Blueprints trade on the market and in contracts like any item. Stations never buy them back, so a player is your only buyer.
- Drops and assembly
- Some blueprints exist only as finds: beyond a Wandering Singularity, from world bosses, or assembled from relic fragments.
A blueprint's tooltip shows the Industry level it needs, and the market shows requirements before you buy. Check them, along with the materials list, before you spend: a large blueprint is an investment that pays back over many runs.
Ordnance: ammunition and missiles#
Energy weapons run on your battery, but mass drivers, coilguns, plasma lances and every launcher burn ammunition. Ammunition is cheap to make, made in big batches, and always in demand: every fight eats it. It is one of the best first things to build.
| Ammunition | Batch | Materials per run | Time per run | Industry level | Fired by |
|---|---|---|---|---|---|
| Kinetic Slugs | 100 | 6 Ferrium, 1 Cobaltium | 20 s | 1 | Mass Driver S, Mass Driver M, Mass Driver L, Coilgun S, Coilgun M, Coilgun L, Rail Repeater S, Rail Repeater M |
| Missiles | 20 | 4 Pyronite, 3 Ferrium, 1 Siliqon | 30 s | 1 | Missile Launcher S, Missile Launcher M, Siege Launcher L, Seeker Launcher M, Seeker Launcher L |
| Flares | 20 | 2 Pyronite, 1 Magmatic Salts | 20 s | 1 | Countermeasure Launcher |
| Micro-Missiles | 80 | 3 Pyronite, 2 Ferrium, 1 Siliqon | 30 s | 1 | Swarm Pod S, Swarm Pod M |
| Torpedoes | 16 | 10 Pyronite, 6 Ferrium, 2 Cobaltium, 1 Siliqon | 45 s | 1 | Breaker Torpedo Bay L, Keelbreaker Torpedo Silo XL, Torpedo Rack S, Torpedo Tube M |
| Plasma Cells | 40 | 3 Cryo Isotopes, 2 Pyronite, 1 Ferrium | 30 s | 1 | Plasma Lance M, Plasma Lance L |
| Hail Rockets | 60 | 2 Pyronite, 2 Ferrium | 25 s | 1 | Hail Rocket Pod S, Hail Rocket Pod M |
| Cruise Missiles | 12 | 14 Pyronite, 8 Ferrium, 2 Aurelite, 1 Guidance Package | 1 min | 1 | Farreach Cruise Launcher L, Farreach Cruise Silo XL |
| Cluster Missiles | 24 | 12 Pyronite, 6 Ferrium, 3 Siliqon, 1 Guidance Package | 50 s | 1 | Bloomburst Cluster Launcher M, Bloomburst Cluster Launcher L |
| Picket Darts | 60 | 2 Pyronite, 2 Siliqon, 1 Ferrium | 30 s | 1 | Picket Dart Rack S, Picket Dart Battery M |
| Disruptor Warheads | 24 | 4 Cryo Isotopes, 3 Pyronite, 1 Aurelite | 40 s | 1 | Quench Disruptor Launcher S, Quench Disruptor Launcher M |
| Thermal Missiles | 20 | 6 Pyronite, 3 Ferrium, 1 Siliqon | 30 s | 1 | |
| Penetrator Missiles | 20 | 3 Pyronite, 3 Cobaltium, 3 Ferrium, 1 Siliqon | 30 s | 1 | |
| Precision Missiles | 20 | 4 Pyronite, 3 Ferrium, 2 Siliqon, 1 Aurelite | 30 s | 1 | |
| High-Velocity Missiles | 20 | 5 Pyronite, 3 Ferrium, 2 Cryo Isotopes, 1 Siliqon | 30 s | 1 | |
| Ion-Tipped Missiles | 20 | 3 Pyronite, 2 Ferrium, 3 Cryo Isotopes, 1 Aurelite | 30 s | 1 | |
| Thermal Micro-Missiles | 80 | 4 Pyronite, 2 Ferrium, 1 Siliqon | 30 s | 1 | |
| Penetrator Micro-Missiles | 80 | 2 Pyronite, 2 Cobaltium, 2 Ferrium, 1 Siliqon | 30 s | 1 | |
| Tandem-Charge Torpedoes | 16 | 8 Pyronite, 6 Cobaltium, 6 Ferrium, 1 Siliqon | 45 s | 1 | |
| Plasma-Core Torpedoes | 16 | 12 Pyronite, 3 Cryo Isotopes, 5 Ferrium, 1 Siliqon | 45 s | 1 | |
| Incendiary Rockets | 60 | 3 Pyronite, 2 Ferrium | 25 s | 1 | |
| Flechette Rockets | 60 | 2 Pyronite, 1 Cobaltium, 2 Ferrium | 25 s | 1 | |
| Terminal-Guided Cruise Missiles | 12 | 14 Pyronite, 8 Ferrium, 3 Aurelite, 1 Guidance Package | 1 min | 1 | |
| Sprint Cruise Missiles | 12 | 16 Pyronite, 8 Ferrium, 3 Cryo Isotopes, 1 Guidance Package | 1 min | 1 |
From the game's own data
All ammunition recipes need only refined metals (Flares add a planetary material), so a miner with a refinery can supply themselves. Every station sells the basic three types and their blueprints; trade hubs carry the rest.
Launchers#
Missile launchers are built like any module. The Missiles skill decides which ones you can fit; Industry decides which ones you can build.
| Launcher | Size | Fires | Missiles to fit | Industry to build | Materials per run |
|---|---|---|---|---|---|
| Missile Launcher S | S | Missiles | 1 | 1 | 2 Hull Plating, 2 Quantum Processor |
| Hail Rocket Pod S | S | Hail Rockets | 5 | 1 | 2 Hull Plating, 1 Quantum Processor, 4 Pyronite |
| Swarm Pod S | S | Micro-Missiles | 10 | 1 | 2 Hull Plating, 2 Quantum Processor, 4 Siliqon |
| Quench Disruptor Launcher S | S | Disruptor Warheads | 25 | 1 | 1 Hull Plating, 2 Power Cell, 2 Quantum Processor, 4 Cryo Isotopes |
| Torpedo Rack S | S | Torpedoes | 30 | 1 | 3 Hull Plating, 2 Quantum Processor, 6 Cobaltium |
| Missile Launcher M | M | Missiles | 25 | 15 | 6 Hull Plating, 5 Quantum Processor |
| Hail Rocket Pod M | M | Hail Rockets | 30 | 15 | 6 Hull Plating, 3 Quantum Processor, 12 Pyronite |
| Swarm Pod M | M | Micro-Missiles | 35 | 15 | 6 Hull Plating, 6 Quantum Processor, 10 Siliqon |
| Torpedo Tube M | M | Torpedoes | 45 | 15 | 9 Hull Plating, 5 Quantum Processor, 18 Cobaltium |
| Seeker Launcher M | M | Missiles | 45 | 15 | 6 Hull Plating, 7 Quantum Processor, 4 Aurelite |
| Quench Disruptor Launcher M | M | Disruptor Warheads | 50 | 15 | 4 Hull Plating, 5 Power Cell, 5 Quantum Processor, 2 Void Matter |
| Bloomburst Cluster Launcher M | M | Cluster Missiles | 70 | 15 | 6 Hull Plating, 5 Quantum Processor, 3 Guidance Package, 10 Siliqon |
| Breaker Torpedo Bay L | L | Torpedoes | 40 | 35 | 24 Hull Plating, 10 Quantum Processor, 4 Guidance Package, 40 Cobaltium |
| Siege Launcher L | L | Missiles | 55 | 35 | 20 Hull Plating, 14 Quantum Processor, 4 Void Matter |
| Farreach Cruise Launcher L | L | Cruise Missiles | 60 | 35 | 18 Hull Plating, 12 Quantum Processor, 8 Guidance Package, 8 Aurelite |
| Seeker Launcher L | L | Missiles | 70 | 35 | 20 Hull Plating, 18 Quantum Processor, 5 Void Matter, 10 Aurelite |
| Bloomburst Cluster Launcher L | L | Cluster Missiles | 80 | 35 | 20 Hull Plating, 14 Quantum Processor, 8 Guidance Package, 4 Void Matter |
| Keelbreaker Torpedo Silo XL | L | Torpedoes | 85 | 70 | 160 Hull Plating, 60 Quantum Processor, 20 Guidance Package, 300 Cobaltium, 20 Void Matter |
| Farreach Cruise Silo XL | L | Cruise Missiles | 90 | 70 | 140 Hull Plating, 70 Quantum Processor, 30 Guidance Package, 24 Void Matter, 6 Xetium |
From the game's own data
Salvage#
Every destroyed ship leaves a wreck. Besides the loot you can take from it, a wreck holds parts you can only recover with a salvage tool. Fit a Scrap Reclaimer, target a wreck and run it: each cycle has a chance to recover salvage, and once it succeeds the parts drop into the wreck for you to loot.
| Tool | Size | Reach | Cycle | Salvaging level | Mounts |
|---|---|---|---|---|---|
| Scrap Reclaimer | S | 2.5 km | 6 s | 1 | utility, fixed, turret |
| Salvage Rig M | M | 5 km | 5 s | 25 | utility, turret |
From the game's own data
Bigger wrecks need more Salvaging, and pay more: the larger the hull, the more Salvaged Tech it gives. Salvage often brings up Hull Plating or Power Cells, sometimes a Quantum Processor. Crown Alloy, which Carrion shipwrights need, comes from Hollow Crown wrecks. Each wreck can be salvaged once.
| Wreck tier | Salvaging level | Hull length | Typical hulls |
|---|---|---|---|
| Light wrecks | 1 | up to 40 m | skirmishers, outriders, strike craft |
| Medium wrecks | 10 | up to 120 m | gunships, couriers, dredges |
| Heavy wrecks | 30 | up to 400 m | warships, haulers, heavy warships |
| Capital wrecks | 50 | over 400 m | ships of the line, tenders, flagships |
From the game's own data
| Hull | Class | Salvage bonus | Hold | Skills to fly |
|---|---|---|---|---|
| Wayfarer | Pathfinder | +15% | 260 m³ | Exploration 20 |
| Gleaner | Pathfinder | +25% | 900 m³ | Salvaging 10, Piloting 5 |
| Longsight | Pathfinder | +15% | 520 m³ | Exploration 40, Navigation 20 |
From the game's own data
- Every Salvaging level adds 0.5% salvage chance, and the perks add components, rare processors, twin recoveries and, at 70, the odd Exodus Fleet Databank from heavy wrecks.
- Scrap to Spec (Salvaging and Industry) adds component finds; Ruin Reader (Exploration and Salvaging) helps crack the sealed caches you find in wreck fields.
- Salvaged Tech sells to every station, and components feed straight into your own manufacturing.
- Battle sites, belts after a pirate attack and the edges of big fights are the best hunting grounds.

Something missing or out of date? Tell us on our Discord. More answers in the FAQ.