
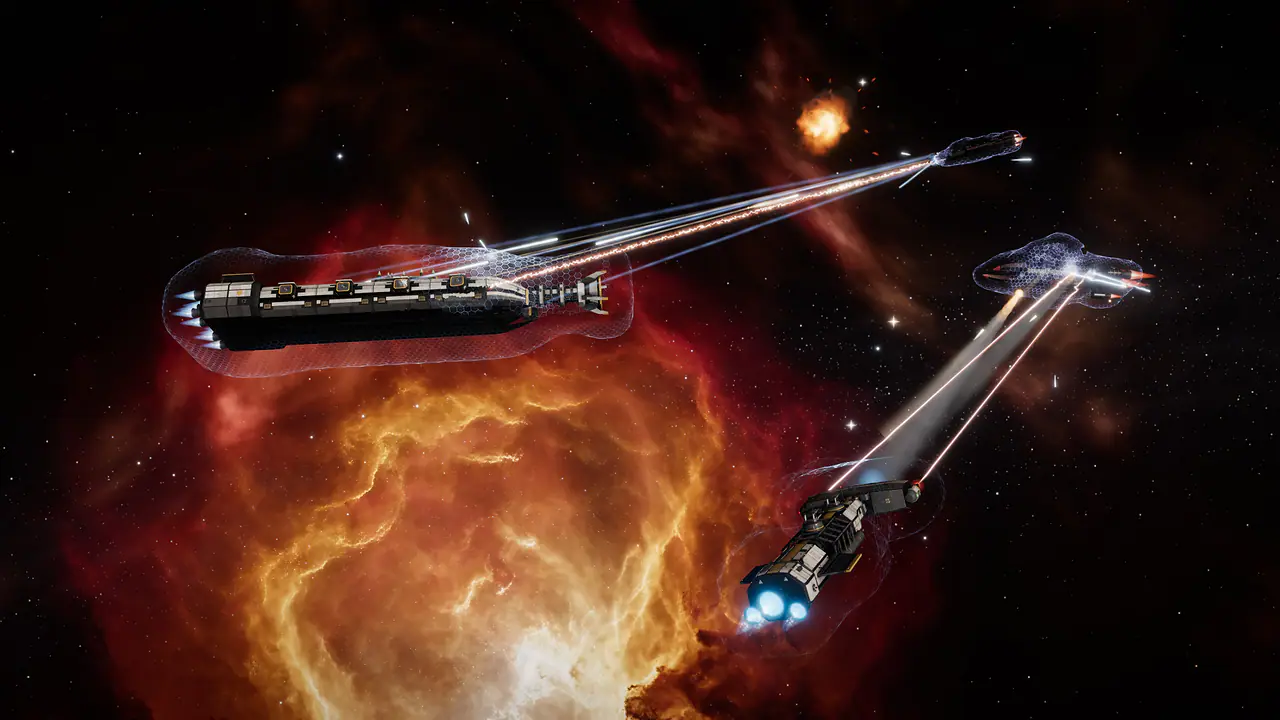
Weapons and damage types#
Every weapon deals one of three damage types, and each type is strong against a different defensive layer. Damage always hits shields first, then armor, then hull.
| Damage type | Shield | Armor | Hull |
|---|---|---|---|
| Energy | ×1.35 | ×0.8 | ×1 |
| Kinetic | ×0.8 | ×1.35 | ×1 |
| Explosive | ×1 | ×1 | ×1.25 |
From the game's own data
- Energy (pulse emitters, beams, arc projectors, ion disruptors, plasma lances) shreds shields but is weak against armor. Most energy guns need no ammunition: they draw on your battery.
- Kinetic (mass drivers, coilguns, rail repeaters) punches through armor but is weak against shields. It fires Kinetic Slugs from your hold.
- Explosive (every missile and torpedo) is even against shields and armor and finishes hulls fastest.
Gun families#
- Pulse Emitters
- Rapid-fire energy pulses with no ammunition. Accurate, steady and forgiving: the starter gun.
- Helion Beams
- Long hitscan beams that out-range pulse emitters by half again, but track poorly up close. Best against slow, large targets.
- Arc Projectors
- Short-range energy brawlers with the best tracking and hardest hits of any gun, at a ruinous battery cost.
- Ion Disruptors
- Barely scratch the hull, but drain the target's battery on every hit. Starve a ship's guns, shields and thrusters.
- Plasma Lances
- Slow, magnetically bottled plasma bolts that hit devastatingly hard inside a few kilometers. Use Plasma Cells.
- Mass Drivers
- The standard kinetic gun: tungsten slugs that break armor.
- Coilguns
- Slow to cycle, but their very fast slugs reach far. Poor tracking up close.
- Rail Repeaters
- Rotary rails that hose slugs at close range and track well. They empty a hold of slugs fast.
| Gun | Damage | Size and mount | Per shot | Cycle | Damage per second | Optimal range | Shot | Uses | Skill |
|---|---|---|---|---|---|---|---|---|---|
| Arc Projector S | Energy | S fixed or turret | 48 | 0.35 s | 137 | 1.1 km | Instant beam | Battery | Gunnery 10 |
| Arc Projector M | Energy | M turret | 105 | 0.6 s | 175 | 2.2 km | Instant beam | Battery | Gunnery 30 |
| Helion Beam S | Energy | S fixed or turret | 70 | 0.8 s | 88 | 4.2 km | Instant beam | Battery | Gunnery 12 |
| Helion Beam M | Energy | M turret | 270 | 2.2 s | 123 | 9 km | Instant beam | Battery | Gunnery 35 |
| Helion Beam L | Energy | L turret | 1,000 | 5 s | 200 | 16 km | Instant beam | Battery | Gunnery 65 |
| Ion Disruptor S | Energy | S fixed or turret | 25 | 1.2 s | 21 | 3 km | Instant beam | Battery | Gunnery 10, Engineering 15 |
| Ion Disruptor M | Energy | M turret | 80 | 2 s | 40 | 6 km | Instant beam | Battery | Gunnery 30, Engineering 35 |
| Plasma Lance M | Energy | M turret | 520 | 3 s | 173 | 4.5 km | Bolt or slug | Plasma Cells | Gunnery 40 |
| Plasma Lance L | Energy | L turret | 1,650 | 5.5 s | 300 | 8 km | Bolt or slug | Plasma Cells | Gunnery 70 |
| Pulse Emitter S | Energy | S fixed or turret | 22 | 0.2 s | 110 | 2.6 km | Instant beam | Battery | None |
| Pulse Emitter M | Energy | M turret | 95 | 0.7 s | 136 | 5.2 km | Instant beam | Battery | Gunnery 25 |
| Pulse Emitter L | Energy | L turret | 340 | 1.6 s | 213 | 9.5 km | Instant beam | Battery | Gunnery 55 |
| Coilgun S | Kinetic | S fixed or turret | 130 | 1.6 s | 81 | 7.5 km | Bolt or slug | Kinetic Slugs | Gunnery 20 |
| Coilgun M | Kinetic | M turret | 440 | 3.4 s | 129 | 13 km | Bolt or slug | Kinetic Slugs | Gunnery 40 |
| Coilgun L | Kinetic | L turret | 1,500 | 6.5 s | 231 | 22 km | Bolt or slug | Kinetic Slugs | Gunnery 70 |
| Mass Driver S | Kinetic | S fixed or turret | 46 | 0.4 s | 115 | 4.2 km | Bolt or slug | Kinetic Slugs | None |
| Mass Driver M | Kinetic | M turret | 165 | 1.1 s | 150 | 7.2 km | Bolt or slug | Kinetic Slugs | Gunnery 25 |
| Mass Driver L | Kinetic | L turret | 620 | 2.4 s | 258 | 12.5 km | Bolt or slug | Kinetic Slugs | Gunnery 55 |
| Rail Repeater S | Kinetic | S fixed or turret | 14 | 0.11 s | 127 | 1.8 km | Bolt or slug | Kinetic Slugs | Gunnery 5 |
| Rail Repeater M | Kinetic | M turret | 36 | 0.2 s | 180 | 3.2 km | Bolt or slug | Kinetic Slugs | Gunnery 30 |
Base numbers before skills, hull bonuses and hit chance. Gunnery skill and hull role bonuses raise the damage. From the game's own data
How hits land#
- Fixed guns fire along your nose. Each has a small gimbal cone: when the lead point of a locked target is inside it, the guns converge on it. Fly the ship to aim.
- Turrets aim themselves. Their chance to hit falls when the target crosses their view faster than they can track, and when it is small: a big turret struggles against a fast little ship. Turrets keep firing a little past their optimal range, with a falling chance to hit.
- Bolts and slugs fly at a finite speed, so lead fast targets: a yellow lead pip shows where to aim, and aim assist snaps onto a pip within a couple of degrees (Settings, Controls).
- Better weapons than the standard ones drop from pirates, wreck fields and world bosses: Crown-Forged (Rare), Exodus-Pattern (Epic) and named Legendary modules. They need higher skill levels to fit.
Missiles and point defense#
Missiles guide themselves to the target, so they hit from any angle and never miss through bad aim. In exchange they need a full lock before they fire, they fly at a modest speed, and they can be shot down or decoyed.
| Launcher | Size and mount | Per volley | Cycle | Damage per second | Range | Missile speed | Uses | Skill |
|---|---|---|---|---|---|---|---|---|
| Bloomburst Cluster Launcher M | M missile or turret | 900 | 7 s | 129 | 14 km | 650 m/s | Cluster Missiles | Missiles 70 |
| Bloomburst Cluster Launcher L | L missile or turret | 2,400 | 11 s | 218 | 20 km | 600 m/s | Cluster Missiles | Missiles 80 |
| Farreach Cruise Launcher L | L missile or turret | 2,400 | 12 s | 200 | 40 km | 950 m/s | Cruise Missiles | Missiles 60 |
| Farreach Cruise Silo XL | L missile | 5,200 | 20 s | 260 | 60 km | 1,000 m/s | Cruise Missiles | Missiles 90 |
| Quench Disruptor Launcher S | S missile or turret | 40 | 5 s | 8 | 8 km | 800 m/s | Disruptor Warheads | Missiles 25, Engineering 15 |
| Quench Disruptor Launcher M | M missile or turret | 160 | 7 s | 23 | 15 km | 700 m/s | Disruptor Warheads | Missiles 50, Engineering 30 |
| Missile Launcher S | S missile | 190 | 3.5 s | 54 | 7.5 km | 650 m/s | Missiles | None |
| Missile Launcher M | M missile or turret | 680 | 6 s | 113 | 12.5 km | 470 m/s | Missiles | Missiles 25 |
| Siege Launcher L | L missile or turret | 2,600 | 10 s | 260 | 17 km | 300 m/s | Missiles | Missiles 55 |
| Hail Rocket Pod S | S missile or turret or fixed | 39 × 2 | 1.2 s | 65 | 3 km | 1,500 m/s | Hail Rockets | Missiles 5 |
| Hail Rocket Pod M | M missile or turret | 100 × 3 | 2.2 s | 136 | 4.5 km | 1,350 m/s | Hail Rockets | Missiles 30 |
| Seeker Launcher M | M missile or turret | 520 | 5 s | 104 | 20 km | 700 m/s | Missiles | Missiles 45 |
| Seeker Launcher L | L missile or turret | 1,900 | 8.5 s | 224 | 28 km | 550 m/s | Missiles | Missiles 70 |
| Swarm Pod S | S missile | 45 × 4 | 4 s | 45 | 5 km | 900 m/s | Micro-Missiles | Missiles 10 |
| Swarm Pod M | M missile or turret | 110 × 6 | 6.5 s | 102 | 8 km | 800 m/s | Micro-Missiles | Missiles 35 |
| Torpedo Rack S | S missile | 700 | 9 s | 78 | 9 km | 380 m/s | Torpedoes | Missiles 30 |
| Torpedo Tube M | M missile or turret | 2,200 | 12 s | 183 | 12 km | 320 m/s | Torpedoes | Missiles 45 |
| Breaker Torpedo Bay L | L missile or turret | 5,600 | 16 s | 350 | 14 km | 240 m/s | Torpedoes | Missiles 40 |
| Keelbreaker Torpedo Silo XL | L missile | 10,800 | 24 s | 450 | 16 km | 210 m/s | Torpedoes | Missiles 85 |
All missiles deal explosive damage. Base numbers before skills and hull bonuses; Missiles skill and Torpedo Craft and missile-boat bonuses raise the damage. From the game's own data
- Fire missiles with the right mouse button (or the Msl button on touch). With Linked missiles on (Settings, Controls), your main trigger and Engage fire them too once the lock is complete.
- Size matters. A missile's damage falls against targets smaller than its warhead is built for, and against targets moving faster than it can follow. Torpedoes are big-ship killers and nearly wasted on small, quick hulls; swarm pods fire several small, agile missiles that suit small targets.
- Warping shakes missiles. A missile loses its target when the target warps away.
- Countermeasure Launchers eject flares (two Flares per use) that can decoy missiles already chasing you within a few kilometers.

Point defense and flak#
Mid-slot point-defense modules fire by themselves at incoming missiles and strike fighters. They need no ammunition and no lock.
| Module | Reach | Skill | What it does |
|---|---|---|---|
| Point Defense | 1.5 km | None | Automated rotary cannon that shoots down incoming missiles and fighters within 1.5 km. |
| Flak Battery | 2.8 km | Gunnery 25 | Twin automatic cannons with airburst shells: shoots down incoming missiles and strike craft within 2.8 km, far more reliably than a rotary point defense. |
| Picket Dart Rack S | 4 km | Missiles 20 | Automatic: launches a hit-to-kill dart at hostile missiles within 4 km aimed at you or a clanmate near you (85% kill on contact, less against torpedoes). Never fires at ships. Uses Picket Darts. |
| Flak Bastion | 4 km | Gunnery 55 | A heavy flak array for the largest hulls: a 4 km umbrella of airbursts that shreds missiles, torpedoes and strike craft. |
| Picket Dart Battery M | 7 km | Missiles 45 | Automatic: a pair of hit-to-kill darts every 1.1 s at hostile missiles within 7 km aimed at you or a clanmate near you. The answer to torpedo and cruise boats. Uses Picket Darts. |
From the game's own data
Shields, armor and hull#

- Shields
- The outer layer. Shields regenerate by themselves a few seconds after the last hit, and a shield regenerator restores them faster at a battery cost. Energy damage is strongest against them.
- Armor
- The middle layer. Armor does not regenerate: repair it with an armor repair array in flight, a Mender's remote repairs, or Repair ship when docked. Kinetic damage is strongest against it.
- Hull
- The last layer. When it reaches zero the ship is destroyed. Hull only repairs at a station. Explosive damage is strongest against it.
The status gauge shows the three layers as blue, amber and red rings, and the target card shows the same three bars for your target. When your hull starts taking damage, the screen edges glow red: that is your signal to leave with B.
Building your defense#
A ship usually leans on one layer. A shield fit stacks shield amplifiers, a regenerator and weaves in its mid slots; an armor fit stacks plates, a plating and repair arrays in its low slots. Defense skill raises all three layers and shield regeneration.
| Module | Slot | Effect | Skill |
|---|---|---|---|
| Barrier Amplifier | Mid | Increases maximum shield strength. | None |
| Heavy Barrier Amplifier | Mid | A heavier barrier amplifier: +38% maximum shield, -3% top speed. | Defense 30 |
| Barrier Regenerator | Mid | Actively recharges shields at the cost of battery charge. | None |
| Heavy Barrier Regenerator | Mid | A high-output regenerator: restores 13% of your shields every 4 s, at a steep battery cost. | Engineering 30 |
| Barrier Wellspring | Mid | Feeds the barrier from a dedicated battery loop: +35% passive shield regeneration. | Defense 15 |
| Ablative Plating | Low | Bolted composite armor: +30% armor, -4% top speed. | None |
| Heavy Ablative Plating | Low | Thick bolted composite: +48% armor, -8% top speed. | Defense 30 |
| Nanite Repair Array | Low | Nanite repair system that restores armor. | None |
| Nanite Surge Array | Low | A high-density nanite swarm: restores 10% of your armor every 6 s. | Engineering 30, Defense 20 |
| Structural Bracing | Low | Structural bracing: +25% hull. | None |
From the game's own data
Resistances#
Barrier weaves (mid slot) turn part of one damage type away from your shields. Several weaves stack with diminishing returns, and shield resistance to any one type is capped at 60%.
| Weave | Shield resistance | Skill |
|---|---|---|
| Heatsink Weave | Energy 20% | Defense 15 |
| Impact Weave | Kinetic 20% | Defense 15 |
| Blastbreak Weave | Explosive 20% | Defense 15 |
| Tri-Phase Weave | Energy 11%, Kinetic 11%, Explosive 11% | Defense 35, Engineering 20 |
From the game's own data
Armor platings (low slot) bolt visible armor onto your hull. Each adds armor and resistances and changes speed, agility and signature differently. Only one plating counts per hull.
| Plating | Armor | Armor resistance | Top speed | Skill |
|---|---|---|---|---|
| Prism Lattice Plating | +14% | Energy 12%, Kinetic 12%, Explosive 12% | None | Engineering 50 |
| Kiln Ceramic Ablator | +15% | Energy 25%, Explosive 5% | -1% | Defense 10 |
| Flashcell Tile Armor | +18% | Kinetic 8%, Explosive 24% | -2% | Engineering 30 |
| Thornback Ram Plating | +20% | Kinetic 12%, Explosive 4% | -3% | Defense 20 |
| Junkwright Scrap Plating | +28% | Kinetic 5% | -6% | None; from pirate bases and Hollow Crown wrecks |
| Keepwall Slab Plating | +45% | Energy 6%, Kinetic 6%, Explosive 6% | -9% | Defense 45 |
From the game's own data
The battery#
Your ship's battery powers energy weapons, active modules and thrusters. It shows as the ring of yellow segments inside the status gauge (and BAT with a percentage under your speed). When a module wants more charge than the battery holds, it switches off with Battery too low.
- Energy guns draw charge with every shot; slug guns and launchers draw a little. Shield regenerators, repair arrays, thrusters, jammers and doctrine arrays draw a share of the battery every cycle.
- The battery recharges all the time, fastest at about 33% full and slower when it is nearly empty or nearly full. Keeping it from running dry recovers more charge.
- Ion Disruptors drain your battery from the outside, so a long fight against one can leave you without power.
- In Fitting, the battery reads as real units: capacity in kilowatt-hours, bus voltage, charge rate and peak output, and Fitted draw shows the average power your whole fit uses.
Managing charge#
- Reserve Cell Banks add capacity; a Fast-Charge Regulator speeds up charging; Engineering skill improves both.
- Pulse emitters are cheap on charge; arc projectors and beams are hungry. A battery-hungry fit wants slug guns or missiles alongside.
- Auto-on-damage repairs stop at 20% so your guns keep some charge.
- Switch off modules you do not need (1 to 9) when the battery runs low.
Battery capacity and charge rate of every hull
| Hull | Class | Capacity | Charge rate | Empty to full |
|---|---|---|---|---|
| Dartwing | Outrider | 70 kWh | 13.5 MW | 19 s |
| Delver | Prospector | 105 kWh | 14.4 MW | 26 s |
| Fairwind | Circuit Ship | 75 kWh | 15.3 MW | 18 s |
| Nightjar | Torpedo Craft | 100 kWh | 15.3 MW | 24 s |
| Sparrow | Skirmisher | 80 kWh | 12.6 MW | 23 s |
| Wayfarer | Pathfinder | 140 kWh | 19.8 MW | 25 s |
| Furrow | Prospector | 150 kWh | 19.8 MW | 27 s |
| Gleaner | Pathfinder | 175 kWh | 21.6 MW | 29 s |
| Halberd | Gunship | 225 kWh | 27 MW | 30 s |
| Hewer | Prospector | 175 kWh | 21.6 MW | 29 s |
| Palisade | Skirmisher | 110 kWh | 16.2 MW | 24 s |
| Peregrine | Hauler | 155 kWh | 19.8 MW | 28 s |
| Suture | Mender | 550 kWh | 54 MW | 37 s |
| Astrolabe | Pathfinder | 325 kWh | 36 MW | 33 s |
| Bulwark | Warship | 650 kWh | 54 MW | 43 s |
| Carrion | Raider | 725 kWh | 61.2 MW | 43 s |
| Driftcomber | Hauler | 600 kWh | 45 MW | 48 s |
| Lifeline | Mender | 1.35 MWh | 113 MW | 43 s |
| Longsight | Pathfinder | 350 kWh | 36 MW | 35 s |
| Mule | Hauler | 400 kWh | 36 MW | 40 s |
| Quarrier | Dredge | 750 kWh | 63 MW | 43 s |
| Quiver | Warship | 700 kWh | 57.6 MW | 44 s |
| Herald | Doctrine Ship | 2.38 MWh | 144 MW | 59 s |
| Ironclad | Heavy Warship | 1.63 MWh | 108 MW | 54 s |
| Tradewind | Hauler | 1 MWh | 68.4 MW | 53 s |
| Monolith | Ship of the Line | 4 MWh | 234 MW | 62 s |
| Colossus | Fighter Tender | 15 MWh | 810 MW | 67 s |
| Hegemon | Flagship | 23.8 MWh | 1.26 GW | 68 s |
| Asterion | Behemoth | 65 MWh | 1.62 GW | 144 s |
| Borealis | Behemoth | 77.5 MWh | 1.76 GW | 159 s |
| Nacre | Behemoth | 85 MWh | 1.89 GW | 162 s |
| Ophion | Behemoth | 67.5 MWh | 1.67 GW | 146 s |
| Meridian | Behemoth | 87.5 MWh | 1.89 GW | 167 s |
| Tellurion | Worldship | 150 MWh | 2.34 GW | 231 s |
Before modules and skills, at the nominal rate. For scale, a Pulse Emitter S shot draws 275 Wh. From the game's own data
Targeting and lock time#
Select a ship to target it: T picks the nearest hostile, Tab cycles through targets, or click its marker or its Tactical row. The target card's Lock bar fills while your sensors lock on.
- Guns do not need a lock: they fire toward your reticle (or along your nose) at any time. A lock helps them, because fixed guns converge on a locked target's lead point and turrets track it on their own.
- Missiles, remote repairers, jammers and seal breakers need a full lock.
- Your lock range is 1.6 times your longest weapon's range, and never less than 15 km. A target beyond it is refused with Out of targeting range.
- Under your nose marker the reticle reads LOCKING, then OUT OF RANGE (with a bar against your guns' reach), IN RANGE, or ON TARGET when the lead pip sits inside your guns' gimbal cone.
Lock time#
Lock time depends on your hull class and on the target's signature, its size on sensors. Small hulls lock fast; big targets are locked faster than small ones. The table shows the base lock time for each class against a 100 m reference signature and against three real hulls.
| Your class | 100 m reference | A Sparrow (25 m) | A Halberd (70 m) | A Monolith (900 m) |
|---|---|---|---|---|
| Circuit Ship | 1.0 s | 1.6 s | 1.1 s | 0.6 s |
| Outrider | 1.2 s | 1.9 s | 1.4 s | 0.6 s |
| Torpedo Craft | 1.4 s | 2.3 s | 1.6 s | 0.6 s |
| Skirmisher | 1.6 s | 2.6 s | 1.8 s | 0.7 s |
| Pathfinder | 1.8 s | 2.9 s | 2.0 s | 0.8 s |
| Prospector | 2.2 s | 3.6 s | 2.5 s | 1.0 s |
| Gunship | 2.4 s | 3.9 s | 2.7 s | 1.1 s |
| Mender | 2.6 s | 4.2 s | 2.9 s | 1.2 s |
| Raider | 3.2 s | 5.2 s | 3.6 s | 1.5 s |
| Warship | 3.5 s | 5.7 s | 4.0 s | 1.6 s |
| Doctrine Ship | 4.0 s | 6.5 s | 4.5 s | 1.9 s |
| Hauler | 4.5 s | 7.3 s | 5.1 s | 2.1 s |
| Dredge | 4.5 s | 7.3 s | 5.1 s | 2.1 s |
| Heavy Warship | 4.5 s | 7.3 s | 5.1 s | 2.1 s |
| Ship of the Line | 6.0 s | 9.7 s | 6.8 s | 2.8 s |
| Fighter Tender | 8.0 s | 13.0 s | 9.1 s | 3.7 s |
| Flagship | 10.0 s | 16.2 s | 11.3 s | 4.6 s |
| Behemoth | 14.0 s | 22.7 s | 15.9 s | 6.5 s |
| Worldship | 20.0 s | 32.5 s | 22.7 s | 9.3 s |
From the game's own data
- A signature shroud (mid slot) shrinks your signature, so enemies take longer to lock you and their turrets hit you less. Firing any weapon drops it for a few seconds.
- A Sensor Jammer can break a locked target's sensors for a few seconds, resetting their lock. Using one is a hostile act, so the usual crime rules apply even if it fails.
- Platings and some modules change your signature too: the fitting window shows it.
Engage: assisted combat#
Press V (or Engage on the combat panel or target card) and your ship fights for you: it locks the nearest hostile, whoever is shooting at you first, flies to your weapons' best range and fires automatically once locked, in range and on target. No trigger needs to be held.
- Attack runs
- With fixed guns, Engage flies nose-on attack runs at about half your guns' range, where they hit most reliably.
- Broadside
- With turrets or missiles only, it circles the target at a comfortable fraction of their range, broadside on.
- Linked missiles
- Launchers join in once the lock completes, if Linked missiles is on in Settings, Controls.
- Modules
- Modules set With Engage switch on when you press V. Repairers on Auto on damage start by themselves when their layer is hit.
- Weapons
- Every gun and launcher fires With Engage unless you set it to Manual only or give it a target size. See weapon fire modes.
- Engage only picks hostile NPCs, war targets and criminals by itself. It never picks a neutral pilot or a Marshal: attacking those is always your own deliberate choice.
- Move the mouse (or the stick) to fly the fight yourself, or press X to stop. Esc releases the mouse while Engage continues; a second Esc stops it.
- Orbit circles the target at your optimal range and Hold range keeps your nose on it at a fixed distance (between 150 m and 50 km). Both are on the target card.
- Engage, Orbit and Hold range work within 60 km of the target. Further out, warp in first. The engagement ends if the target escapes beyond that range.
- The combat panel lists who is shooting you, with their damage per second; click an attacker to engage it. Incoming missiles show with a warning sign.
Auto-retaliate#
When another ship shoots you, your ship can lock it and return fire with turrets and missiles (fixed guns fire when the attacker is ahead). It only ever shoots back at a lawful target, so it never makes you a criminal in Secure space, and it stands down while you warp, dock or Engage. Settings, Gameplay sets it to Off, Return fire or Return fire + lock (which then locks the nearest hostile still fighting you); ; cycles the mode.
Weapon fire modes#
Each gun and launcher has its own fire settings, saved per ship and per slot. Right-click a weapon on the module rack (hold it on a touch screen), or pick its slot in Fitting. They only decide what Engage and auto-retaliate fire by themselves: holding a trigger always fires every weapon on it.
- With Engage
- The default. Engage and return fire use the weapon automatically. No badge.
- Manual only
- Badge M. Never fires by itself; it fires only while you hold its trigger (left mouse for guns, right mouse for launchers, or FIRE and MSL on a touch screen).
- Targets
- For a weapon set With Engage: Any target, Warships and up (badge W), Ships of the Line and up (badge L), Behemoths (badge B). Automatic fire waits for a locked target of at least that hull class. Heavy Warships and Doctrine Ships count as Warships; Fighter Tenders and Flagships as Ships of the Line; Worldships as Behemoths. Support hulls count by their size.
A launcher with munitions to choose from also has Out of selected ammo. Hold fire is the default: when the hold has none of the munition you picked, the launcher stops firing and keeps your choice, so torpedoes or special missiles you are saving are never swapped for something else. The module shows a red 0 and its menu says, for example, "No Penetrator Missiles: holding fire". Fall back to base ammo fires the launcher's base ammunition instead until you restock.
Pirates and other NPCs#
Pirate clans that raid the fringe from hidden bases. They answer to no one, except the Crown. Every Crown pilot carries a bounty, paid to the pilots who destroy it and split by the damage each dealt, and their wrecks can be looted.
| Pilot | Flies | Where you meet them |
|---|---|---|
| Crown Scout | Sparrow | Flight School's Rookie Patrol: weakened, no missiles |
| Crown Scrapper | Sparrow | Secure-space belts while a new pilot is there: worn and missile-less |
| Crown Cutthroat | Sparrow | Belts in Secure space, and in packs elsewhere |
| Crown Raider | Dartwing | Belt packs and combat sites |
| Crown Reaver | Halberd | Combat sites; closes the easiest sites |
| Crown Butcher | Bulwark | Combat sites; closes level 2 sites |
| Crown Warlord | Ironclad | Commands level 3 sites |
| Crown Dreadlord | Monolith | Commands the hardest sites |
| Crown Strike Fighter | Strike Craft | Launched by the Crown's biggest hulls and some elites |
Where pirates are#
- Belts. In Secure space a pirate turns up rarely and alone, and the Accord Marshals answer its first shot at a pilot. Contested belts get packs of two or three; Lawless belts packs of three or four.
- Combat sites. Sites send waves while a pilot is on site and end with a commander. Higher levels are harder and pay more. Cleared sites refill after a while.
- Reinforcements give warning. A pack or wave is announced 15 seconds before it lands, and warps in 15 to 30 km away, never on top of you. After a site wave falls the next one waits 30 to 45 seconds (call it in sooner from the toast), and only a few pirates fight you at once while the rest hold back.
- Raids. Now and then the Crown raids a system; an announcement names it with a Travel button.
- Strongholds and world bosses. Every pirate killed, site cleared and raid repelled raises Crown Wrath (shown in the Almanac). At its peak the Crown commits a world boss. See world bosses.
Elites#
Every Shatterdrift, an old battle-wreck graveyard, is held by a named elite Crown captain and its escort. The elite wakes when a pilot comes near and fights with special attacks it telegraphs first: watch the warnings on screen. After it dies, the drift stays quiet for a while.
| Elite | Hull | Drift levels | What it does |
|---|---|---|---|
| Scrapjaw | Halberd | 1 to 2 | A Halberd welded shut with scrap plate. Hits hard up close. |
| The Tollman | Bulwark | 2 to 3 | Collects a toll from every hauler in the drift. Refills its shields if you let it. |
| Mine Weaver | Quarrier | 2 to 4 | A mining dredge that seeds the wreckage with proximity mines. |
| Harrow Gaff | Carrion | 3 to 4 | Hooks its prey with a grapple, then opens up at point-blank range. |
| Broodkeeper | Herald | 3 to 5 | A doctrine ship refitted as a strike-craft nest. |
| Emberwright | Ironclad | 4 to 5 | An Ironclad with an overcharged spinal emitter. |
| Nightglass Lurker | Nightjar | 4 to 5 | Vanishes from sensors and reappears behind its victim. |
| Reactor Despot | Monolith | 5 | A ship of the line running its reactor past the red line. |
From the game's own data
World bosses are the Crown's biggest ships: Gravemaw, The Hollow King, The Ossuary Matriarch, The Unbroken Wall, The Stormwright, The Pale Regent. Every pilot who deals a real share of the damage gets spoils at their home station.
Other NPCs#
- Accord Marshals
- The police of Secure space. They fight pirates, Crown bosses and criminal pilots. See Marshals.
- Traders
- Neutral NPC ships going about their business. They do not fight.
Pilot versus pilot#
Any pilot can open fire on any other pilot outside their own clan and crews, in every security band. What it costs depends on where you are. Another pilot's Tactical row carries a HOSTILE, NEUTRAL or FRIENDLY tag, and their target card spells out the rule for this system.
| Where | Shown as | What happens |
|---|---|---|
| Secure | Neutral · Secure | Secure space: attacking a pilot is a crime: 1.5 law standing, you are marked a criminal, and the Accord Marshals respond. |
| Contested | Neutral · Contested | Contested space: attacking costs 0.5 law standing and marks you a criminal for 15 minutes (anyone may then fire on you). |
| Lawless | Neutral · free fire | Lawless space: any pilot may be attacked, with no law penalty. |
From the game's own data
- Friendly
- Your clan and your crews. Your weapons hold fire on them; they cannot be damaged.
- Hostile
- War targets (clans at war with yours) and pilots marked criminal. Open fire anywhere without penalty. A pilot who is Suspect may also be attacked without penalty.
- Attacking a neutral pilot costs law standing (1.5 in Secure space, 0.5 in Contested) and marks you a criminal for 15 minutes. In Lawless space it costs nothing.
- Combat timer: for a minute after you damage another pilot or a Marshal, you cannot dock or jump through a gate.
- A short grace protects pilots who just undocked or arrived through a gate, until they act: after an undock, pirates and Marshals hold fire for 8 seconds while you fly clear, dock again or warp away.
- Clans can declare wars on rival clans: war targets are hostile everywhere. See clans.
Security levels#

Every system's security rating puts it in one of three bands. The top-left of the HUD shows the band of the system you are in, and the galaxy map colors every system by it. See the galaxy map for how many systems each band has.
- Secure
- Accord Marshals patrol. Pirates are rare and weak at the belts, and Marshals answer a pirate's attack on a pilot. Attacking a neutral pilot is a crime the Marshals respond to. The safest place to learn, mine and trade.
- Contested
- No police. Pirates come in packs, sites are tougher and richer, and attacking a pilot costs law standing and marks you a criminal, but nobody comes to stop it.
- Lawless
- No police and no law: any pilot may attack anyone, with no penalty. The best ores, sites and wrecks are here, and so are the most dangerous pilots.
- The galaxy map's Safest route avoids Contested and Lawless systems where it can, and shows how many of each band a route crosses.
- Wreck loot, ores and site rewards get better as security falls. Risk and reward go together.
- Your ship's hull bond pays less (or nothing) if you are lost while a criminal. See Hull Bonds.
The law: Suspect, Criminal and Wanted#
The Solari Accord's law marks pilots who break it. When you have a status, a law card at the top of the right column shows it with a live countdown, the reason, what it means and how it ends. Your own pilot card shows it too.
| Status | How you get it | What it means | How it ends |
|---|---|---|---|
| Suspect | A stray hit on a Marshal, repeated crossfire on one, theft (looting a wreck while another pilot still holds the rights to it), or attacking a civilian trader outside Lawless space. Usually 60 seconds, 5 minutes for theft or a civilian. | Any pilot may fire on you without penalty. Marshals will not engage you. | Ends when the timer runs out, or if your ship is destroyed. |
| Criminal | Attacking a pilot in Secure or Contested space (15 minutes), or deliberately firing on a Marshal or using a hostile module on one (10 minutes). | Marshals will engage you in Secure space. Any pilot may fire on you. | Ends when the timer runs out. Being destroyed by the Marshals pays it at once. |
| Wanted | A Criminal that Accord Marshals are hunting right now. | Accord Marshals are hunting you. Any pilot may fire on you. | Break off and dock to wait it out. If the Marshals destroy you, the offense is paid. |
From the game's own data
- Gate control refuses criminals in Secure space: you cannot jump while you are a criminal there.
- Your timer belongs to you, not your ship: docking, changing ships or signing out never clears it, and you never need to sign out to clear a status that has ended.
- Any death ends a Suspect status. A criminal destroyed by the Marshals has paid in full: the timer clears at once and the HUD says Offense paid.
- A criminal destroyed by someone else stays wanted for the rest of the timer, but on the first launch afterwards the Marshals hold off for 45 seconds. Attacking anyone ends that grace.
- A toast and a sound tell you when a status starts, worsens, eases or ends.
- Docked while you have a status, the station shows it above Undock with its countdown, which keeps running while you are docked or signed out.
Weapons safety#
Every pilot starts with weapons safety on. The shield at the top of the right column shows it; click it to change it, or use Settings, Gameplay. While it is on, your ship refuses anything that would make you a Suspect or a Criminal and a message says why. Pirates, war targets and flagged pilots are always fair game, and Lawless space has no law to break.
- Safe
- Blocks every action that would give you a status. The default.
- Allow suspect actions
- Allows attacking civilian traders, looting other pilots' wrecks and other acts that make you a Suspect. Attacks on Marshals and pilots stay blocked.
- Allow criminal actions
- Safety off: your weapons fire on Marshals and on any pilot. Turning it off asks you to confirm.
The Accord Marshals#
Marshals are the Accord's police: Marshal Outriders in Dartwings and Marshal Custodians in Bulwarks. They patrol Secure space, fight pirates, Crown bosses and strike fighters, and warp in to hunt any pilot who is a criminal in Secure space. They never engage a Suspect.
- A Marshal hunting you shows red, double, pulsing brackets labeled Hunting you, a HUNTING YOU tag in Tactical and a line on its target card. Your law card then says Wanted.
- Break off and dock to wait the timer out, or accept the loss: being destroyed by the Marshals pays the offense.
- Responders leave within seconds once their job is done.
Stray fire#
Marshals often fight the same pirates you do, and sometimes fly into your line of fire. The law tells mistakes from attacks:
- Crossfire, a stray hit while you are locked on a lawful target such as a pirate, is never a crime. The first is a warning (Check your fire); only repeated crossfire that adds up to real damage earns a short Suspect status.
- A glancing hit while locked on a Marshal (or firing freely) earns a warning and a 60 seconds Suspect status.
- Continued fire after that, or significant damage, makes you a criminal for 10 minutes. So does using a hostile module such as a jammer on a Marshal, at once.
In a fight, Marshals fly level, hold their distance on their side of the target, slide out of other ships' firing lanes and hold fire while someone else is in their own line of fire. The target card of any Marshal reminds you of the rule.
Losing your ship#
Ships are meant to be lost now and then. When your hull reaches zero the screen shows SHIP DESTROYED, who killed you and in what, and a note about any bond payout. A few seconds later you wake up docked at your home station.
- The wreck
Your ship leaves a wreck where it died. Part of your cargo and some of your fitted modules survive in it; the rest is destroyed. The pilot who killed you (and their clan) has the rights to the wreck for a few minutes; anyone else who loots it then is marked Suspect for theft. Wrecks of pirates you kill work the same way in your favor.
- Your new ship
You wake up in the first ship docked at your home station that you can fly. If there is none, the Accord fleet office issues you a free Sparrow: fitted, with a basic missile load, at most once every 30 minutes, and a bare hull otherwise. If you own no mining laser at all, the first such Sparrow also comes with a Starter Mining Laser: once per pilot, and it can't be sold or traded.
- The bond
If the hull was bonded, the Keelwright Mutual pays its share of the keel value (and any module and cargo cover) to your wallet. See Hull Bonds.
- Your status
Death ends a Suspect status and the combat timer. A criminal destroyed by the Marshals has paid the offense.
- Get back out
Your skills, wallet, hangar items and other ships are untouched. Board another ship, fit it and undock.
- Choose your home. Docked at any station, Set as home station in the station header makes it the place you wake up (once every 24 hours). Pick one near where your ships are.
- Bound items such as Skill Tomes and Vanguard-only items never drop into a wreck.
- Go back for your wreck quickly: wrecks do not last forever, and other pilots can loot it once the killer's rights run out.
- Losses to crashes or re-entry heat count too, and leave a wreck like any other.
Something missing or out of date? Tell us on our Discord. More answers in the FAQ.