
Planets and atmospheres#
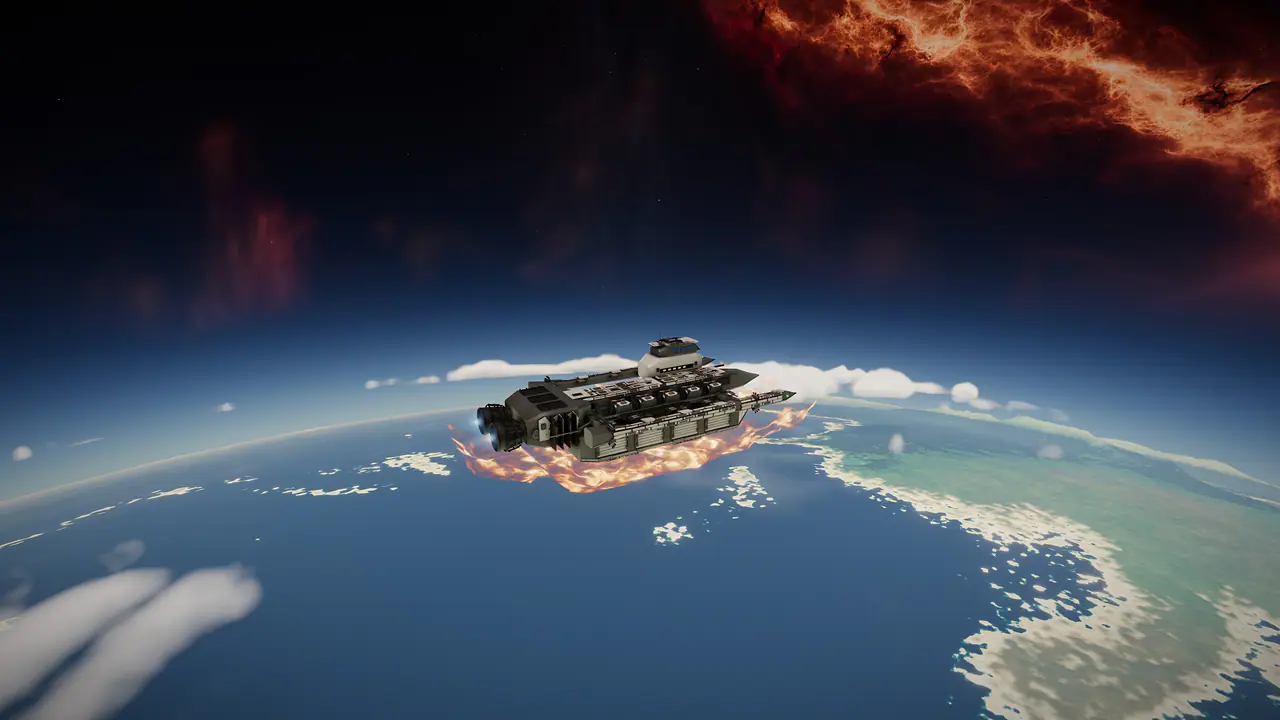
Worlds come in nine types. All of them except gas giants have solid ground you can land on, and each type has its own gravity, sky, terrain and resources. Planets stay where they are on the map, so a world you find today is in the same place tomorrow.
| World | Landable | Atmosphere | Gravity | Surface resources | Colony habitability |
|---|---|---|---|---|---|
| Temperate | Yes | Moderate | 8 to 11 m/s² | Bio-Organics, Heavy Water | 85% to 100% |
| Ocean | Yes | Thick | 8 to 12 m/s² | Heavy Water, Bio-Organics | 80% to 100% |
| Jungle | Yes | Thick | 9 to 13 m/s² | Bio-Organics, Rare Earths, Heavy Water | 75% to 100% |
| Desert | Yes | Thin | 6 to 10 m/s² | Rare Earths | 45% to 95% |
| Glacial | Yes | Thin | 5 to 9 m/s² | Heavy Water | 35% to 90% |
| Volcanic | Yes | Thin | 8 to 13 m/s² | Magmatic Salts, Rare Earths | 15% to 75% |
| Barren | Yes | None | 2 to 6 m/s² | Rare Earths | 10% to 80% |
| Toxic | Yes | Thick | 7 to 12 m/s² | Rare Earths, Magmatic Salts | 20% to 85% |
| Gas Giant | No (orbit only) | Thick, no solid surface | 18 to 26 m/s² | None | No colonies |
Colony habitability shows where a new colony starts and how far terraforming can take it. From the game's own data

Flying in an atmosphere#
- Air slows you down and heats your hull when you fly fast through it. Watch the Hull heating warning on the HUD: let it climb too high and your ship starts taking damage.
- You can't warp inside an atmosphere. Climb back to space first, then align and warp as usual.
- Barren worlds have no air at all, so there is nothing to slow you or heat your hull on the way down.
- Gas giants can't be landed on. Their moons can, though: see Moons.
Planetary spaceports#
Many landable worlds have spaceports on the surface. Each one runs its own market, and each world type trades its own goods (organics, rare earths, volcanic minerals, heavy water), often far cheaper than in orbit. Touching down on a spaceport pad docks you, just like a station. See Markets for how trading works.
Landing and takeoff#
Landing is mostly automatic. Warp to a landable planet and you drop out about 70 km above the surface. Within 75 km of the ground the Landing controls card appears, and one click brings you down.
- Warp to a landable world
Pick the planet in the Tactical list, on the system map or from your Favorites and warp to it. Gas giants can't be landed on.
- Open the landing controls
Once you are within 75 km of the surface, the Landing controls card shows up on its own.
- Press Land here
Click Land here or press Y. Your ship brakes, levels out along the horizon, then descends at a safe speed through the air.
- Touch down
The assist sets you down on the ground. If you land on a spaceport pad, you dock. Press X at any time to cancel and take the controls back.
- Take off again
Click Take off to orbit or press Y to climb straight back to the arrival height, ready to warp.
| Control | What it does |
|---|---|
| Y | Land here, or Take off to orbit once landed |
| X | Cancel the landing or takeoff assist |
| F | Ease down during a manual landing |
| W | Lift off manually |
| R | Lift off manually |
On touch screens the same card has Land here, Stop and lift-off buttons. Full control layouts are in Desktop controls and Touch controls.
Landing by hand#
You can also land yourself. Stop with X, cut the throttle and ease down with F. Touchdown only happens below 12 m/s, so come in slowly and level.
Hulls that can't land#
Some hulls are simply too big for a planet. The Behemoths and Worldships stay in orbit: they can't use planetary pads or the landing assist and never touch down on a planet or a moon. They also moor outside orbital stations instead of docking inside. See Ship classes.
| Hull | Class |
|---|---|
| Asterion | Behemoth |
| Nacre | Behemoth |
| Borealis | Behemoth |
| Ophion | Behemoth |
| Meridian | Behemoth |
| Tellurion | Worldship |
From the game's own data

Planetary harvesting#
Every ship carries a small onboard collector, so you don't need any module to start gathering. Land on a world, then choose Gather in the landing controls (or Collect water for Heavy Water). The collector fills your hold every few seconds and trains the Harvesting skill until you stop or your hold is full.
| Resource | Needs | Found on | Per cycle at that level | Per cycle at 99 | Per hour at 99 |
|---|---|---|---|---|---|
| Bio-Organics | Harvesting 1 | Temperate, Ocean, Jungle | 15 | 22 | 13,200 |
| Heavy Water | Harvesting 1 | Temperate, Ocean, Jungle, Glacial | 8 | 12 | 7,200 |
| Rare Earths | Harvesting 10 | Jungle, Desert, Volcanic, Barren, Toxic | 6 | 9 | 5,400 |
| Magmatic Salts | Harvesting 25 | Volcanic, Toxic | 5 | 7 | 4,200 |
One collector cycle takes 6 seconds before perks. Yields are for a ship with no harvest tools fitted. From the game's own data
The Resources window lists every planetary material, the worlds that hold it and a Travel to nearest world button. Rare Earths and the volcanic resources are worth more per unit, so higher Harvesting levels pay off quickly.
Harvest tools and the Furrow#
- Augers fit in low slots and raise every harvest: Regolith Auger and Deep Auger Array.
- The Furrow is a dedicated planetary harvester (a Prospector) with +30% harvest yield, four low slots for augers and a 1,400 m³ hold.
- Harvest tools and hull bonuses multiply together, up to three times the base yield.
Harvesting perks
- Level 20: Collector Tuning I
- Collector cycles run 4% faster.
- Level 35: Deep Sampling
- One cycle in twelve also brings up a batch of another resource the world holds.
- Level 50: Collector Tuning II
- Collector cycles run another 4% faster.
- Level 60: Rich Pockets I
- 5% of collector cycles bring up a double haul.
- Level 70: Frontier Harvesting
- +10% harvest yield on worlds in Contested and Lawless space.
- Level 80: Collector Tuning III
- Collector cycles run another 4% faster.
- Level 90: Master Collector
- Another 5% of collector cycles bring up a double haul.
Two skill synergies tie Harvesting and Colonization together: Homestead Stores (Harvesting and Colonization) makes your colonies' farms grow more food, and Civic Command (Leadership and Colonization) trims colony upkeep. See Synergies.
Founding a colony#
Colonies are a city builder inside the game. Every landable world has 8 surveyed plateaus. Claim one, zone districts, add services and landmarks, and your colonists build the rest while you fly. The population pays taxes into the colony treasury, and you collect them.

- Open Colonies
Open Colonies from the menu and go to Found a colony. The Skills window also has a Travel to nearest button for a world to settle.
- Pick a world
Choose a planet in your current system. The wizard shows its starting habitability and whether the first colonists will live under a dome.
- Pick a site
Choose one of the surveyed plateaus. Sites other pilots already hold show their owner.
- Name it and sign the charter
Give it a name (3 to 28 letters, digits and spaces) and pay the ₡50,000 charter. You must be in orbit of the planet or docked at one of its stations.
Part of the charter fee seeds the new treasury with ₡10,000 to cover running costs for the first days. You start as an Outpost with a command hub at the center and a ring of open ground around it.
How many colonies you can hold#
The Colonization skill sets how many charters you may hold and how many construction crews each colony gets. Every pilot can found their first colony right away.
| Level | Colonies | With the Vanguard Charter | Construction crews |
|---|---|---|---|
| Colonization 1 | 1 | 2 | 2 |
| Colonization 25 | 2 | 3 | 3 |
| Colonization 50 | 3 | 4 | 4 |
| Colonization 75 | 4 | 5 | 5 |
| Colonization 99 | 5 | 6 | 6 |
From the game's own data
Training Colonization#
- Founding a colony, building, colony growth, milestones and collecting taxes all train Colonization.
- Visiting other pilots' colonies trains it too: land at someone else's colony once a day for a little Colonization and Exploration XP.
- Helping defend someone's colony from a raid pays Colonization XP too.
Selling, gifting and abandoning#
The Charter exchange tab lets you buy a developed colony from another pilot, or list your own (from its Settings) publicly or for a named pilot. The buyer pays a 2% transfer fee (minimum ₡250) and needs a free charter slot and the charter's Colonization level. Offers expire after 7 days, and editing the colony cancels its offer. Your skill XP always stays with you.
Zones, supplies and growth#
A colony is a 24 by 24 grid of 64 m tiles on its plateau. Open your colony and use the Build tab to place things, the Depot tab for supplies and the Overview tab for its numbers. You can place up to 64 tiles at a time, and clearing a tile costs ₡500.
Zoning#
You don't build homes and shops one by one. You zone tiles, and colonists build on them by themselves whenever there is demand. Each district then densifies one level at a time, and every step takes construction supplies from the colony depot.
- Habitat
- Homes. They follow jobs, happiness and land value. Parks, forests and lakes nearby raise land value; heavy industry next door lowers it, and nobody builds towers beside a smelter.
- Industry
- Workshops and factories. Lots of jobs, but also pollution.
- Commerce
- Shops and offices. Jobs plus a boost to tax income.
- Agriculture
- Greenhouses and vertical farms. They feed the colony; colonists without local food eat expensive imports, which shows up as upkeep.
Zone levels: what each step provides
| Zone | Level | Provides | Power / water | Upkeep per hour |
|---|---|---|---|---|
| Habitat (₡1,500 a tile) | Level 1 | 60 homes | 1 / 1 | ₡2 |
| Level 2 | 320 homes | 2 / 2 | ₡6 | |
| Level 3 | 1,400 homes | 3 / 3 | ₡16 | |
| Level 4 | 5,200 homes | 5 / 5 | ₡40 | |
| Industry (₡2,000 a tile) | Level 1 | 50 jobs | 2 / 1 | ₡3 |
| Level 2 | 220 jobs | 4 / 2 | ₡8 | |
| Level 3 | 800 jobs | 7 / 4 | ₡20 | |
| Level 4 | 2,600 jobs | 11 / 6 | ₡48 | |
| Commerce (₡2,000 a tile) | Level 1 | 35 jobs | 1 / 1 | ₡3 |
| Level 2 | 160 jobs | 2 / 2 | ₡8 | |
| Level 3 | 700 jobs | 4 / 3 | ₡20 | |
| Level 4 | 2,500 jobs | 8 / 5 | ₡45 | |
| Agriculture (₡1,000 a tile) | Level 1 | 900 food, 15 jobs | 1 / 2 | ₡1 |
| Level 2 | 3,500 food, 40 jobs | 2 / 4 | ₡3 | |
| Level 3 | 12,000 food, 90 jobs | 4 / 6 | ₡7 |
From the game's own data
The depot#
Districts grow from supplies in the colony depot: ordinary market goods such as Ferrium, Siliqon, Hull Plating and Power Cells. If something runs out, growth stalls and the colony shows what it is waiting for, along with what the next few steps will need.
- Fly it down: land on the colony's plateau and unload cargo straight into the depot (or load from it).
- Ship it as freight: dock at a station in the same system and send items between that station's hangar and the depot. Freight costs ₡4 for every m³ of cargo, with a minimum of ₡100.
- Vanguard items can't be stored in a colony depot.
What limits density#
- Your charter: an Outpost only grows level 1 districts; each charter upgrade allows taller ones (see Charters, taxes and upkeep).
- Habitability: a domed colony builds low (see Terraforming).
- Power and water: a real shortage stops all densifying until you fix it.
- The skyline: towers rise downtown near the hub, mid-rises further out and low-rise suburbs at the edge. High land value lifts a habitat tile one level higher.
Services and landmarks#
Services keep the lights on and the colonists healthy. Landmarks are big, slow projects that add happiness and prestige. Each costs credits up front, takes supplies from the depot, needs a Colonization level and charter, and has a running cost every hour once it's finished.
| Building | Cost | Supplies | Needs | Build time | Upkeep per hour | Max |
|---|---|---|---|---|---|---|
| Fusion Plant | ₡80,000 | 160 Pyronite, 14 Power Cell, 80 Cobaltium | Colonization 1, Outpost | 1 h | ₡70 | Any |
| Water Reclamation | ₡40,000 | 200 Ferrium, 80 Heavy Water | Colonization 1, Outpost | 45 min | ₡35 | Any |
| Research Campus | ₡80,000 | 8 Quantum Processor, 20 Aurelite | Colonization 10, Settlement | 1 h 30 min | ₡80 | 3 |
| Medical Center | ₡60,000 | 40 Medical Supplies, 80 Siliqon | Colonization 5, Outpost | 1 h | ₡50 | Any |
| Defense Grid | ₡90,000 | 4 Shield Emitter, 12 Hull Plating, 6 Power Cell | Colonization 15, Settlement | 1 h 30 min | ₡70 | 4 |
| Colony Spaceport | ₡150,000 | 20 Hull Plating, 4 Thruster Assembly, 40 Cryo Isotopes | Colonization 20, Settlement | 2 h | ₡120 | 1 |
| Atmosphere Processor | ₡250,000 | 120 Cryo Isotopes, 80 Magmatic Salts, 20 Power Cell, 4 Thruster Assembly | Colonization 25, Settlement | 3 h | ₡150 | 4 |
| Climate Regulator | ₡180,000 | 60 Cryo Isotopes, 12 Power Cell, 80 Cobaltium | Colonization 35, Settlement | 2 h | ₡100 | 3 |
| Beacon Tower | ₡2,000,000 | 200 Aurelite, 40 Void Matter, 30 Quantum Processor, 60 Hull Plating | Colonization 60, City | 12 h | ₡300 | 1 |
| Grand Biodome | ₡1,200,000 | 800 Bio-Organics, 400 Heavy Water, 300 Siliqon, 6 Shield Emitter | Colonization 45, Township | 8 h | ₡200 | 1 |
| Orbital Elevator | ₡8,000,000 | 40 Xetium, 200 Void Matter, 10 Warp Coil, 400 Hull Plating, 40 Thruster Assembly | Colonization 85, Metropolis | 48 h | ₡600 | 1 |
| Exodus Monument | ₡400,000 | 60 Aurelite, 200 Cobaltium | Colonization 30, Settlement | 4 h | ₡60 | 1 |
Base build times. Every Colonization level shortens them (by about 36% at Colonization 89), and the Master Planner perk at 90 takes off another 10%. From the game's own data
Services and landmarks are built by your construction crews, one project per crew (more crews come every 20 Colonization levels). Parks, forests, lakes and plazas use separate landscaping crews, so a big planting never blocks a power plant.
Landscaping#
| Feature | Cost | Supplies | Build time | What it does |
|---|---|---|---|---|
| Park | ₡2,000 | 20 Bio-Organics | 10 min | Meadows, paths and a few trees. Raises nearby habitat value. |
| Forest | ₡5,000 | 60 Bio-Organics, 15 Heavy Water | 30 min | Plant a stand of trees. Saplings mature over a day; mature forest cleans the air and adds habitability. |
| Lake | ₡8,000 | 150 Glacite | 45 min | Excavate a basin and flood it with melted ice. Supplies water, cools the climate and makes prime waterfront. |
| Plaza | ₡8,000 | 20 Ferrium | 10 min | Paved square with fountains and market stalls. A little happiness and land value. |
From the game's own data
Terraforming and habitability#
Habitability is how livable your world is. Temperate, Ocean and Jungle worlds start almost perfect. Harsh worlds start below 50%, so the first colonists live under a dome: it costs extra upkeep, colonists are less happy, and districts stay low.
- Below 35%
- Under the dome, districts grow to level 2 at most.
- 35% to 50%
- Still domed, districts grow to level 3.
- 50% and up
- The dome comes down. The colony grows in the open air and districts can reach level 4.
Raising habitability#
- Atmosphere Processors (up to 4) and Climate Regulators (up to 3) raise habitability every day. Each further one of the same kind adds a little less than the one before.
- Mature forests, lakes and the Grand Biodome add a smaller nature bonus on top.
- Every world type has a ceiling it can't go past, shown in the table below.
| World | Starts at | Can reach | Starts domed | Dome lifts after |
|---|---|---|---|---|
| Temperate | 85% | 100% | No | Open air from day one |
| Ocean | 80% | 100% | No | Open air from day one |
| Jungle | 75% | 100% | No | Open air from day one |
| Desert | 45% | 95% | Yes | about 1 day |
| Glacial | 35% | 90% | Yes | about 3 days |
| Volcanic | 15% | 75% | Yes | about 6 days |
| Barren | 10% | 80% | Yes | about 7 days |
| Toxic | 20% | 85% | Yes | about 6 days |
The last column assumes every Atmosphere Processor and Climate Regulator is running, before any nature bonus. From the game's own data
Two milestones reward terraforming a domed world: First Breath, when the dome comes down, and Garden World, when habitability reaches 75%. Prestige also rises with how far you have lifted a harsh world.
Charters, taxes and upkeep#
Colonies run in 10-minute cycles. Every cycle, people move in or out toward the housing on offer, districts grow, research accrues and taxes flow into the treasury while upkeep flows out.
Charter upgrades#
Upgrading the charter surveys more land around the hub and allows taller districts. Each step needs a Colonization level, credits and supplies in the depot.
| Charter | Needs | Cost | Supplies from the depot | Buildable tiles | Tallest districts |
|---|---|---|---|---|---|
| Outpost | Colonization 1 | ₡50,000 | None | 32 | Level 1 |
| Settlement | Colonization 12 | ₡750,000 | 1,500 Ferrium, 24 Hull Plating, 8 Power Cell | 88 | Level 2 |
| Township | Colonization 30 | ₡3,000,000 | 1,200 Cobaltium, 70 Hull Plating, 24 Power Cell, 10 Quantum Processor | 180 | Level 3 |
| City | Colonization 50 | ₡10,000,000 | 3,500 Cobaltium, 180 Hull Plating, 36 Quantum Processor, 10 Shield Emitter | 300 | Level 4 |
| Metropolis | Colonization 70 | ₡30,000,000 | 260 Void Matter, 420 Hull Plating, 100 Quantum Processor, 10 Warp Coil | 468 | Level 4 |
From the game's own data
Taxes#
Income grows with population, happiness, employment and commerce. A Colony Spaceport, the Orbital Elevator and the Orbital Trade technology add to it. You choose the tax rate:
- Low
- Less income, happier colonists.
- Normal
- The default balance.
- High
- More income, but a clear happiness penalty.
Press Collect to move the treasury into your wallet. The treasury holds at most 24 hours of income (and never less than ₡25,000 of room); anything earned past that is lost, so collect at least once a day.
Upkeep and happiness#
Buildings and districts cost upkeep every hour. If the treasury can't cover it, services are cut back and happiness drops for a while. The Overview tab breaks happiness down into its parts: healthcare, security, nature and open space, landmarks and amenities, pollution, unemployment, power, water and food shortages, life under the dome, your tax rate and clanmates' colonies on the same planet.
Research#
Research Campuses produce research points. Spend them in the Research tab on colony technologies:
| Technology | Research points | Effect |
|---|---|---|
| Vertical Farming | 200 | Farms grow 50% more food. |
| Fusion Tuning | 400 | Fusion plants deliver 25% more power. |
| Smart Grid | 600 | Colony upkeep −8%. |
| Genetic Forestry | 900 | Forests mature twice as fast and count 50% more toward land value. |
| Weather Control | 1,200 | Storm damage −75%. |
| Orbital Trade | 2,000 | +10% tax income. |
From the game's own data
Colony milestones
- 1,000 colonists
- 10,000 colonists
- 50,000 colonists
- 100,000 colonists
- A quarter million
- Half a million
- A million souls
- First Breath: the dome comes down
- Garden World
- Inland Sea (20 lakes)
- Township charter
- Metropolis charter
- First landmark
The Rankings tab lists the cluster's most prestigious colonies. Prestige grows with population, happiness, landmarks, lakes and forests, terraforming and visitors.
Events and raids#
Now and then something happens to your colony. The colony's event history shows each one.
- Storms
- Each world type has its own weather: dust storms, blizzards, monsoons, acid rain, ash falls and more. A storm lowers happiness for a few hours and can wreck a district, which then rebuilds. Climate Regulators and the Weather Control technology soften them. On Barren worlds it's a meteor shower, and a Defense Grid shoots down every fragment.
- Discoveries
- Surveyors find ruins (research points) or a cache of resources for the depot. Research Campuses make discoveries more common and richer.
- Trade booms
- Tax income rises by 20% for 8 hours. More likely in a colony with plenty of commerce.
- Festivals
- Colonists celebrate in the parks and plazas: a happiness boost.
- Immigrants
- A wave of settlers arrives when you have spare housing.
- Epidemics
- Large colonies without enough healthcare can suffer an epidemic. Medical Centers prevent them.
Hollow Crown raids#
Once a colony is a Settlement or bigger, the Hollow Crown pirates take an interest in its treasury. Raids are far more frequent in Contested and Lawless space than in Secure space. They come in two forms.
- Live raids: while pilots are in the system, a strike group can arrive and circle low over the colony. Everyone in the system is alerted and has 12 minutes to shoot the raiders down. Larger colonies and rougher space bring heavier raiders.
- Raids while nobody is around: they are settled in the background. A colony with enough Defense Grids drives them off; one without loses part of its treasury and may lose a district.
Beat a live raid and the colony rallies with a happiness boost. Every pilot who stayed to fight (other than the owner) splits a thank-you from the treasury, up to ₡25,000 each, and earns Colonization XP. Fail, and the raiders loot part of the treasury and wreck a district.
The Greenhouse (Xenobiology)#
Every station has a members' Greenhouse Bay. Open it from the Vanguard menu (the Greenhouse tab) or a station's Vanguard Skills service while docked. Buy a strain's seed stock, plant it with Bio-Organics from that station's hangar, and it grows in real time through four stages, even while you're offline. Come back to harvest in person: the crop goes into that station's hangar.
| Strain | Xenobiology | Grows in | Seed stock | Yield | Thrives above | Notes |
|---|---|---|---|---|---|---|
| Lumen Moss | 1 | 1 h | ₡300 | 40 to 60 Bio-Organics | Temperate, Jungle | |
| Brinecap Kelp | 10 | 2 h | ₡800 | 60 to 90 Food Rations | Ocean | |
| Hollow Gourd | 10 | 3 h | ₡1,300 | 90 to 116 Food Rations | Jungle, Temperate | Festival seed stock only |
| Tidesilk Fern | 15 | 3 h | ₡1,200 | 85 to 110 Heavy Water | Ocean, Glacial | Charter Reach and Lantern Veil bays only |
| Emberroot | 20 | 3 h | ₡2,000 | 50 to 70 Magmatic Salts | Volcanic, Desert | |
| Frostcap Shoots | 28 | 4 h | ₡3,000 | 58 to 76 Cryo Isotopes | Glacial | |
| Frost Lantern | 30 | 5 h | ₡3,500 | 44 to 56 Medical Supplies | Glacial | Festival seed stock only |
| Mendleaf | 35 | 5 h | ₡5,000 | 45 to 65 Medical Supplies | Temperate, Jungle | |
| Salvemoss | 40 | 4 h | ₡4,000 | 44 to 58 Medical Supplies | Temperate, Jungle | Hybrid of Lumen Moss and Mendleaf |
| Starglass Lotus | 45 | 6 h | ₡6,000 | 175 to 220 Rare Earths | Glacial, Barren | Charter Reach and Lantern Veil bays only |
| Glasswing Orchid | 50 | 8 h | ₡12,000 | 28 to 40 Luxury Goods | Glacial | |
| Bloomtide Blossom | 50 | 8 h | ₡11,000 | 28 to 36 Luxury Goods | Temperate, Ocean | Festival seed stock only |
| Aureate Coral | 58 | 9 h | ₡14,000 | 80 to 100 Aurelite | Desert, Volcanic | |
| Duskbloom | 65 | 10 h | ₡20,000 | 22 to 32 Dusk Resin | Jungle, Toxic | Lawless bays only |
| Pulsebloom | 70 | 10 h | ₡24,000 | 16 to 20 Xetium | Gas Giant, Toxic | Charter Reach and Lantern Veil bays only |
| Emberglass Orchid | 75 | 9 h | ₡18,000 | 40 to 52 Luxury Goods | Volcanic, Glacial | Hybrid of Emberroot and Glasswing Orchid |
| Voidvine | 80 | 12 h | ₡30,000 | 55 to 75 Void Matter | Gas Giant, Barren | |
| Novaheart Lily | 88 | 16 h | ₡33,000 | 7 to 9 Nova Lattice | Gas Giant, Glacial | |
| Nightshade Crown | 92 | 14 h | ₡30,000 | 60 to 76 Void Matter | Gas Giant, Toxic | Hybrid of Voidvine and Duskbloom |
| Crownroot Bonsai | 95 | 20 h | ₡42,000 | 30 to 38 Xetium | Temperate, Barren |
From the game's own data
Duskbloom is a contraband crop: it only grows in Lawless bays, and Accord Marshals scan for its harvest in Secure space (see Law and security). Seasonal strains are sold only while their festival runs, then keep growing afterwards (see Seasons). A hybrid unlocks once you have harvested both of its parents.
Blight#
Blight can strike between growth stages. Diagnose it at the bay and treat it before the next stage, either with the right material from the station's hangar or by paying the bay's agronomist. Each untreated blight cuts the harvest to 60% of what it would have been, and three untreated blights wither the crop.
There are 3 kinds: Leaf Rust (orange pustules on the leaves; treat with Bio-Organics), Root Mites (wilting from the roots up; treat with Magmatic Salts) and Spore Bloom (mold and drifting spores; treat with Medical Supplies).
- Compost doubles the growth medium and halves the blight chance.
- A bay keeper costs 30% of the seed price and prevents blight entirely.
- Each Xenobiology level raises yields and lowers the blight chance a little.
Bigger harvests#
A crop yields 25% more when the bay's station orbits a world the strain thrives on, and 15% more when you run a colony in the same system. Together with bay fittings, the bonus is capped at 40%.
| Level | Plots in one bay | With every fitting you can install | Plots across all bays |
|---|---|---|---|
| Xenobiology 1 | 2 | 2 | 5 |
| Xenobiology 10 | 3 | 3 | 6 |
| Xenobiology 25 | 4 | 5 | 7 |
| Xenobiology 45 | 5 | 7 | 9 |
| Xenobiology 65 | 6 | 8 | 11 |
| Xenobiology 85 | 7 | 10 | 13 |
| Xenobiology 99 | 7 | 10 | 14 |
From the game's own data
| Fitting | Needs | Credits | Effect |
|---|---|---|---|
| Tray racks | Xenobiology 15 | ₡120,000 | +1 plot in this bay |
| Climate control | Xenobiology 35 | ₡400,000 | +1 plot in this bay and crops planted here blight 40% less often |
| Full-spectrum lamps | Xenobiology 55 | ₡1,200,000 | Crops planted here grow 10% faster |
| Misting array | Xenobiology 75 | ₡3,000,000 | +1 plot in this bay and +5% yield (within the bay bonus cap) |
From the game's own data
Moons#
Many planets have moons: small, airless bodies that really orbit their world. Gas giants always have at least two. Moons are named after their planet with a letter (a world's first moon is its "-a"), and you'll find them in the Tactical list alongside the other destinations.
- Irregular moonlets
- Lumpy, potato-shaped bodies a few kilometers across, with a giant crater and grooves.
- Moons
- Rounder bodies of 12 km radius or more around large worlds and gas giants, with dark plains and old craters.
- Make-up
- Each moon is basaltic, dusty silicate, carbon-rich, icy or iron-rich, which sets its colors and the deposits it tends to hold.
Flying to and landing on a moon#
- Warp to a moon like any other destination. The game aims for where the moon will be when you arrive, and you drop out several kilometers above its highest ground.
- Close to a moon you fly in its frame, so you can hover, land and park on a body that is racing around its planet without being dragged along.
- Gravity is very low and there is no air, so descents are gentle and nothing heats your hull. Land here works just as on planets, and Take off climbs back to the drop-out height.
- The outermost moon of some worlds is a captured body: on a steep or even backward orbit, and slowly tumbling.
Anyone can land on a moon. Drilling their deposits is the Vanguard skill Extracting, below. The Almanac's Moons tab explains deposits and rigs at a glance.
Extracting moon deposits#
Open Extracting from the menu or with [. The loop is survey, build, run, collect.
- Survey
Buy a Seismic Beacon (₡30,000 at any trade hub), land on a moon and plant it. It maps the deposits around it, for you alone.
- Build
Land within 350 m of a flat spot inside a mapped deposit and build a rig from a kit in your hold. Building pays a permit: ₡50,000 in Secure space, ₡20,000 in Contested and nothing in Lawless.
- Run
The rig works on its own, burning Fusion Cartridges, until its fuel runs out or its hopper fills.
- Collect and refuel
Land beside the rig, empty the hopper into your hold and load more cartridges. XP comes with every unit collected.
- Pack up
To move a rig, empty its hopper and pack it up: the kit and any unburned cartridges come back.
Every trade hub stocks the Seismic Beacon, the Burrow Rig Kit and Fusion Cartridges. Heavier kits come from the largest foundries or your own manufacturing (see Manufacturing).
| Deposit | Ore | Lightest rig | Extracting | Security bands |
|---|---|---|---|---|
| Grayfall regolith field | Grayfall Regolith | Burrow Rig | Level 1 | Secure, Contested, Lawless |
| Ilmenite sand flat | Ilmenite Sand | Burrow Rig | Level 10 | Secure, Contested, Lawless |
| Cold-trap ice | Cold-Trap Ice | Burrow Rig | Level 20 | Secure, Contested, Lawless |
| Helium-3 regolith | Helium-3 Fines | Auger Rig | Level 35 | Secure, Contested, Lawless |
| Rare-earth nodule bed | Rare-Earth Nodules | Auger Rig | Level 50 | Secure, Contested, Lawless |
| Impact glass strewnfield | Impact Glass | Core Bore | Level 65 | Contested, Lawless |
| Meteoric iron seam | Meteoric Iron-Nickel | Core Bore | Level 80 | Secure, Contested, Lawless |
| Core song vein | Core Song Crystal | Tidal Rig | Level 92 | Lawless (large moons only) |
Every moon's first deposit is a Grayfall field, so a new driller always has somewhere to start. From level 20 up, some deposits are richer deep seams that need a Core Bore or a Tidal Rig. From the game's own data
| Rig | Needs | Output | Hopper holds | Tank holds | Cartridges per hour | Deep seams |
|---|---|---|---|---|---|---|
| Burrow Rig | Extracting 1 | ×1 | 10 h | 12 h | 0.5 | No |
| Auger Rig | Extracting 30 | ×1.25 | 14 h | 16 h | 0.8 | No |
| Core Bore | Extracting 60 | ×1.45 | 18 h | 20 h | 1.2 | Yes |
| Tidal Rig | Extracting 85 | ×1.65 | 24 h | 28 h | 1.6 | Yes |
From the game's own data
Limits#
- At most 3 of your rigs on one moon, 5 rigs on one deposit and 36 rigs on one moon, counting everyone's.
- The survey office caps the value of moon ore an account may collect each day (the daily manifest).
| Level | Rigs across all moons | Daily manifest |
|---|---|---|
| Extracting 1 | 1 | ₡233,000 |
| Extracting 8 | 2 | ₡324,000 |
| Extracting 18 | 3 | ₡454,000 |
| Extracting 28 | 4 | ₡584,000 |
| Extracting 40 | 5 | ₡740,000 |
| Extracting 55 | 6 | ₡935,000 |
| Extracting 70 | 7 | ₡1,130,000 |
| Extracting 85 | 8 | ₡1,325,000 |
| Extracting 90 | 9 | ₡1,390,000 |
From the game's own data
Siphons#
Rigs can't be destroyed, but in Contested and Lawless space other pilots can tap a rig's hopper. A tap means landing nearby and holding still for 40 seconds, and it takes a share of the hopper. Each rig can only be tapped once every few hours, clanmates can't tap each other, and a tap in Contested space marks the thief a criminal for 10 minutes. Secure space seals every rig, but Contested and Lawless deposits are richer.
Extracting perks
- Level 12: Steady Bits I
- Your rigs bring up 3% more (rigs only).
- Level 22: Seismic Reading
- Seismic Beacons map deposits 20% farther out.
- Level 33: Fuel Discipline I
- Rigs burn 10% fewer Fusion Cartridges (rigs only).
- Level 45: Deep Hoppers
- Rig hoppers hold 25% more before they stop (rigs only).
- Level 52: Tamper Lock
- Siphons take a quarter less from your rigs.
- Level 62: Steady Bits II
- Your rigs bring up another 3% more (rigs only).
- Level 74: Fuel Discipline II
- Rigs burn another 10% fewer Fusion Cartridges (rigs only).
- Level 82: Prospector's Eye
- One Seismic Beacon maps every deposit on the moon.
- Level 90: Master Driller
- One more rig, and your rigs bring up another 4% more (rigs only).
Dark Matter pockets#
From Extracting 5 you can also work Dark Matter pockets: pitch-black knots hanging off the plane of a system, ringed by a shimmering fringe. They appear in the Tactical list. Hold position near one with a harness in your hold and start a run: every cycle burns Containment Cells, draws Dark Matter from the pocket's shared reserve and sometimes turns up something the pocket had swallowed.
| Harness | Needs |
|---|---|
| Dark Matter Harness I | Extracting 5 |
| Dark Matter Harness II | Extracting 25 |
| Dark Matter Harness III | Extracting 50 |
| Dark Matter Harness IV | Extracting 80 |
From the game's own data
Something missing or out of date? Tell us on our Discord. More answers in the FAQ.